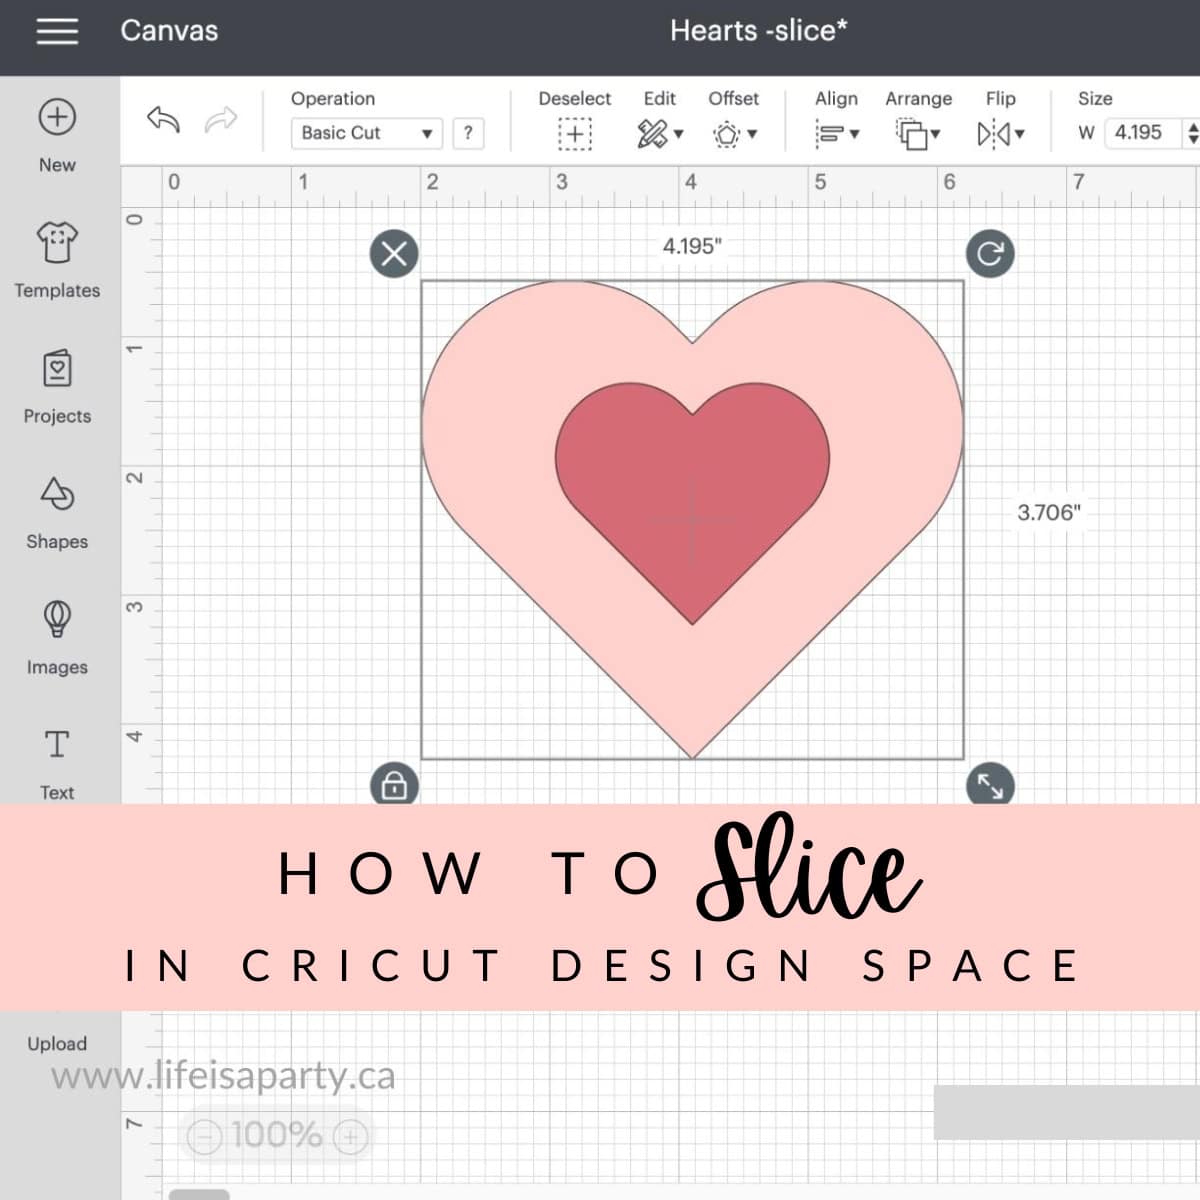
How To Slice in Cricut Design Space: step by step guide of how to slice on Cricut, including when to use this tool for cropping, making new shapes, and creating a split monogram.
Jump to:
- What Actually Is Slice?
- When Do You Use Slice?
- Things You Need To Know About Slice
- Where Is The Slice Tool?
- Troubleshooting Slice -Why Is Slice Grayed Out?
- How To Use Slice
- Using Slice To Crop An Object
- Using Slice To Create New Shapes
- Using Slice To Cut An Item Into Multiple Items
- Creating A Split Monogram
- Subscribe For Lots More Cricut Projects and Tips and Tricks
Slice is an important tool within Cricut Design Space that will allow you to slice shapes and text that you want to create with your Cricut machine.
What Actually Is Slice?
I like to think of the slice tool like a cookie cutter, because that's how it functions. It might be helpful to picture your dough, cookie cutter, and the cookie cut out of the dough, as the material, the item you're slicing out, and the piece that is sliced out of the material. You can then delete any items you don't want in your design. There are many different ways to use the slice tool in your Cricut projects which is sure to make it one of your favorite tools in Cricut Design Space.
When Do You Use Slice?
To Create a Hole, or Slice Text Out Of An Object
Slice is a great way to remove or slice some text or a shape out of another object and leave a hole there. Again think of the cookie cutter, or hole punch if that's helpful. So it's great for slicing text out of a shape, or adding a hole to an object when you're making something like a gift tag.
Create New Shapes
One of my favourite ways to use the slice function is to create new shapes and make new shapes. For example, slice a circle into a crescent moon shape. With weld and slice working together you can create just about any shape you want from the free basic shapes in Cricut Design Space.
Crop Items or Cut Off Unwanted Parts
If you have an item and you want to crop it, or remove a certain part of it, slice works really well for this. You would use a free shape, and make it large enough to cover the unwanted part, then select both and slice. Then simply delete the unwanted parts.
Cut An Item Into Multiple Pieces
Let's say you have an item that has a single image and some text and they aren't different layers. You can use the slice tool to separate the text item from the rest and move it around wherever you would like it in your design.
Things You Need To Know About Slice
- You have to have two overlapping layers to use slice. You cannot use slice on individual layers. This one is pretty logical if you think about it, you need something as a bottom layer to slice out of, and you need the item you're using to slice with (the dough and the cookie cutter).
- Slice only works on two layers at a time. If you have more than two layers selected the slice tool will be grayed out and unavailable to select.
- You can slice text.
Where Is The Slice Tool?
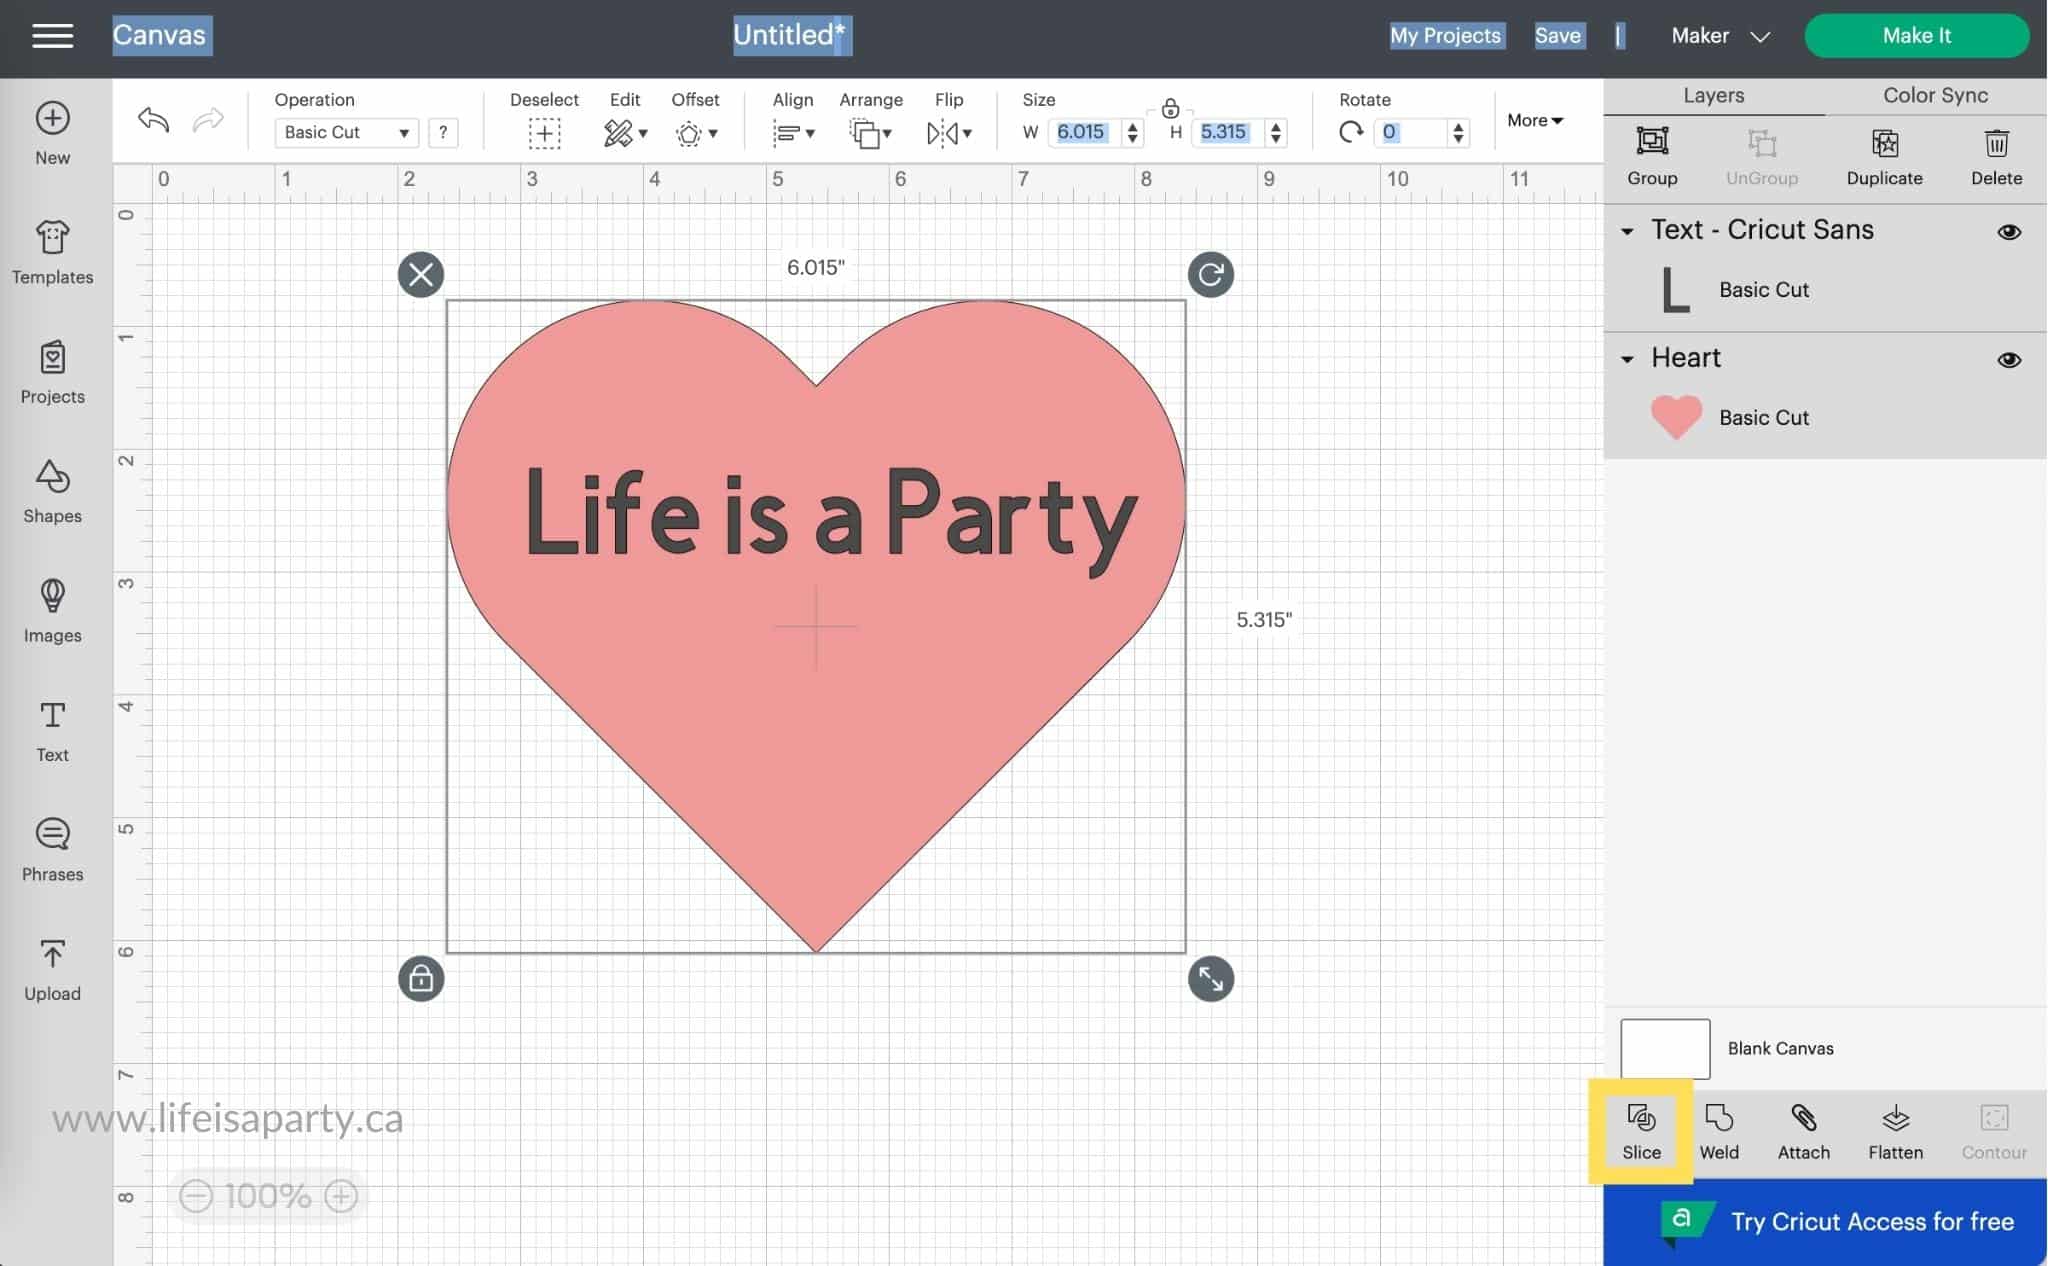
Desktop -on your desktop device slice is located at the bottom of the layers panel, on the lower right corner of your canvas.
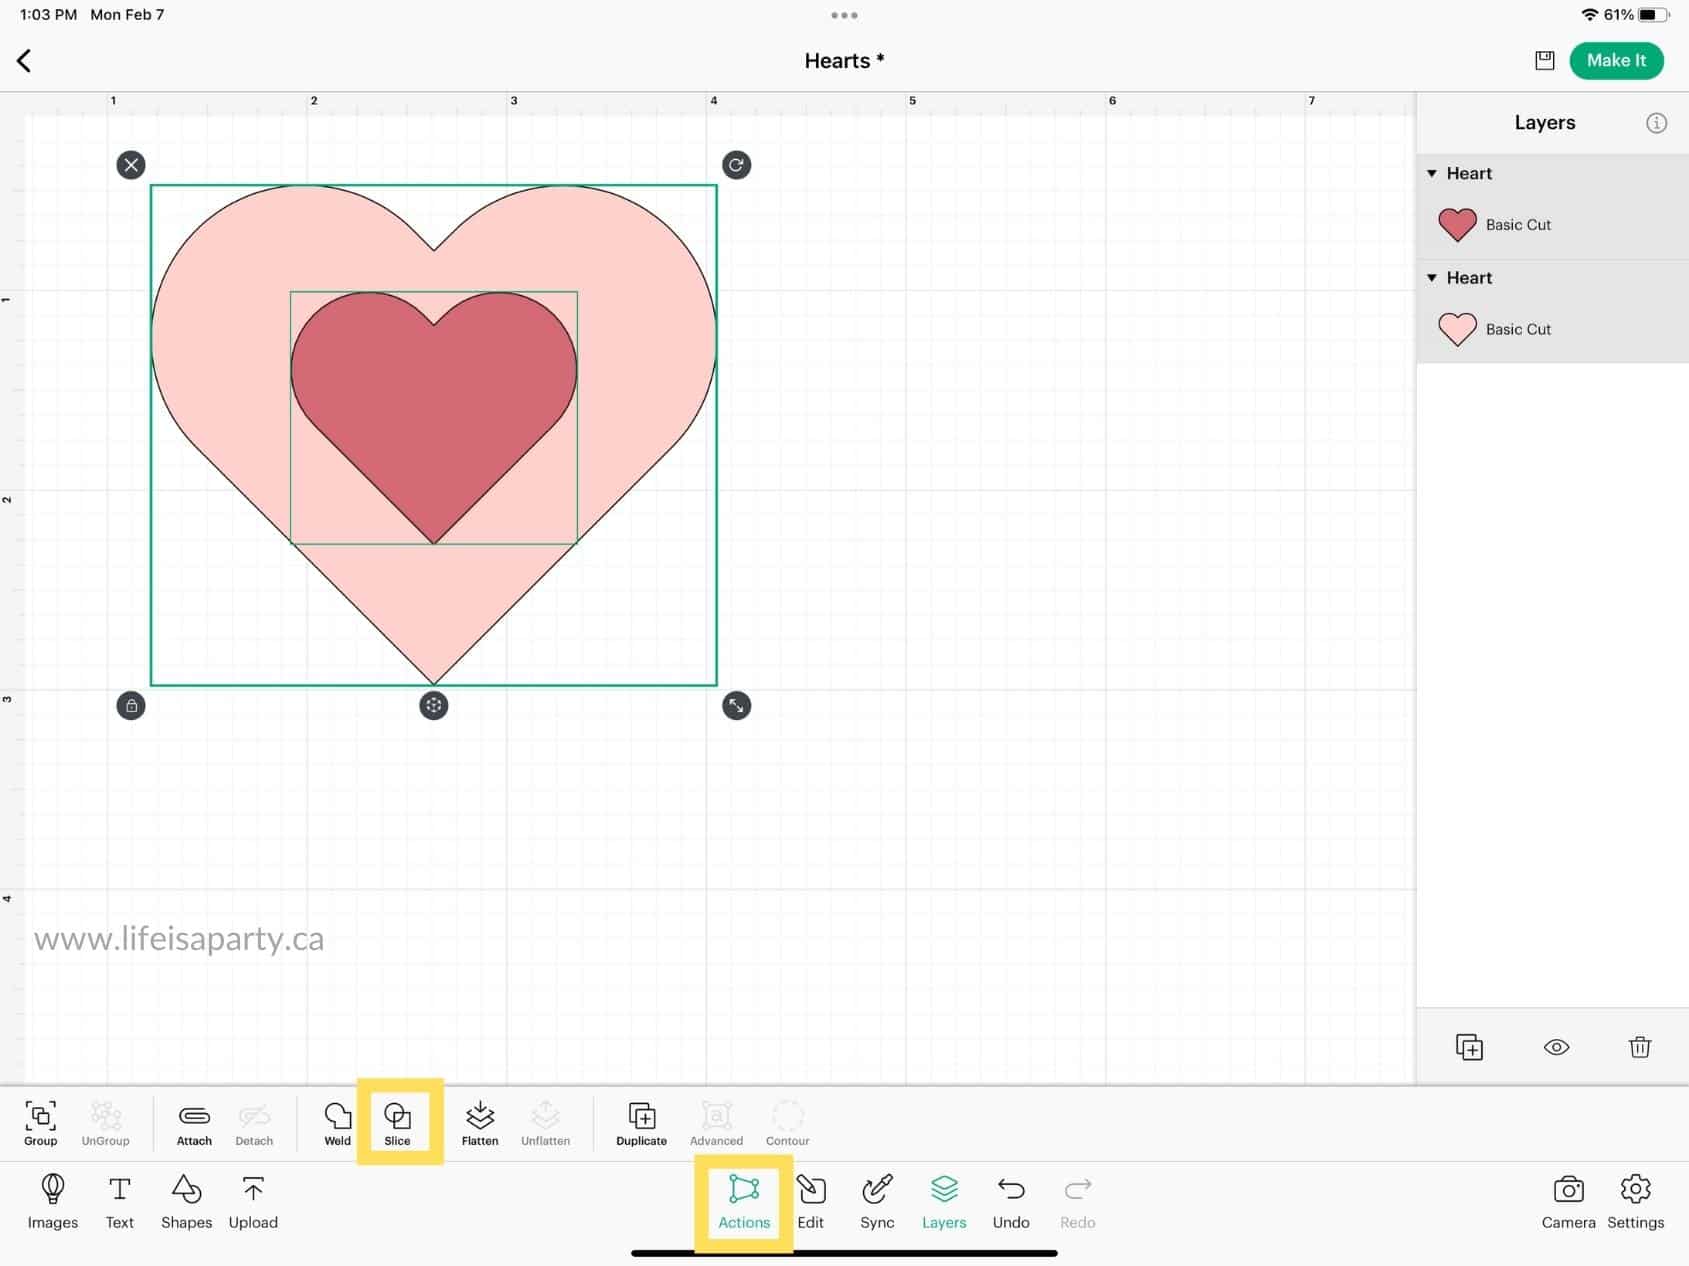
iOS -you will find it under the actions menu. So first click on the actions menu at the bottom of your screen, and then look for the slice button.
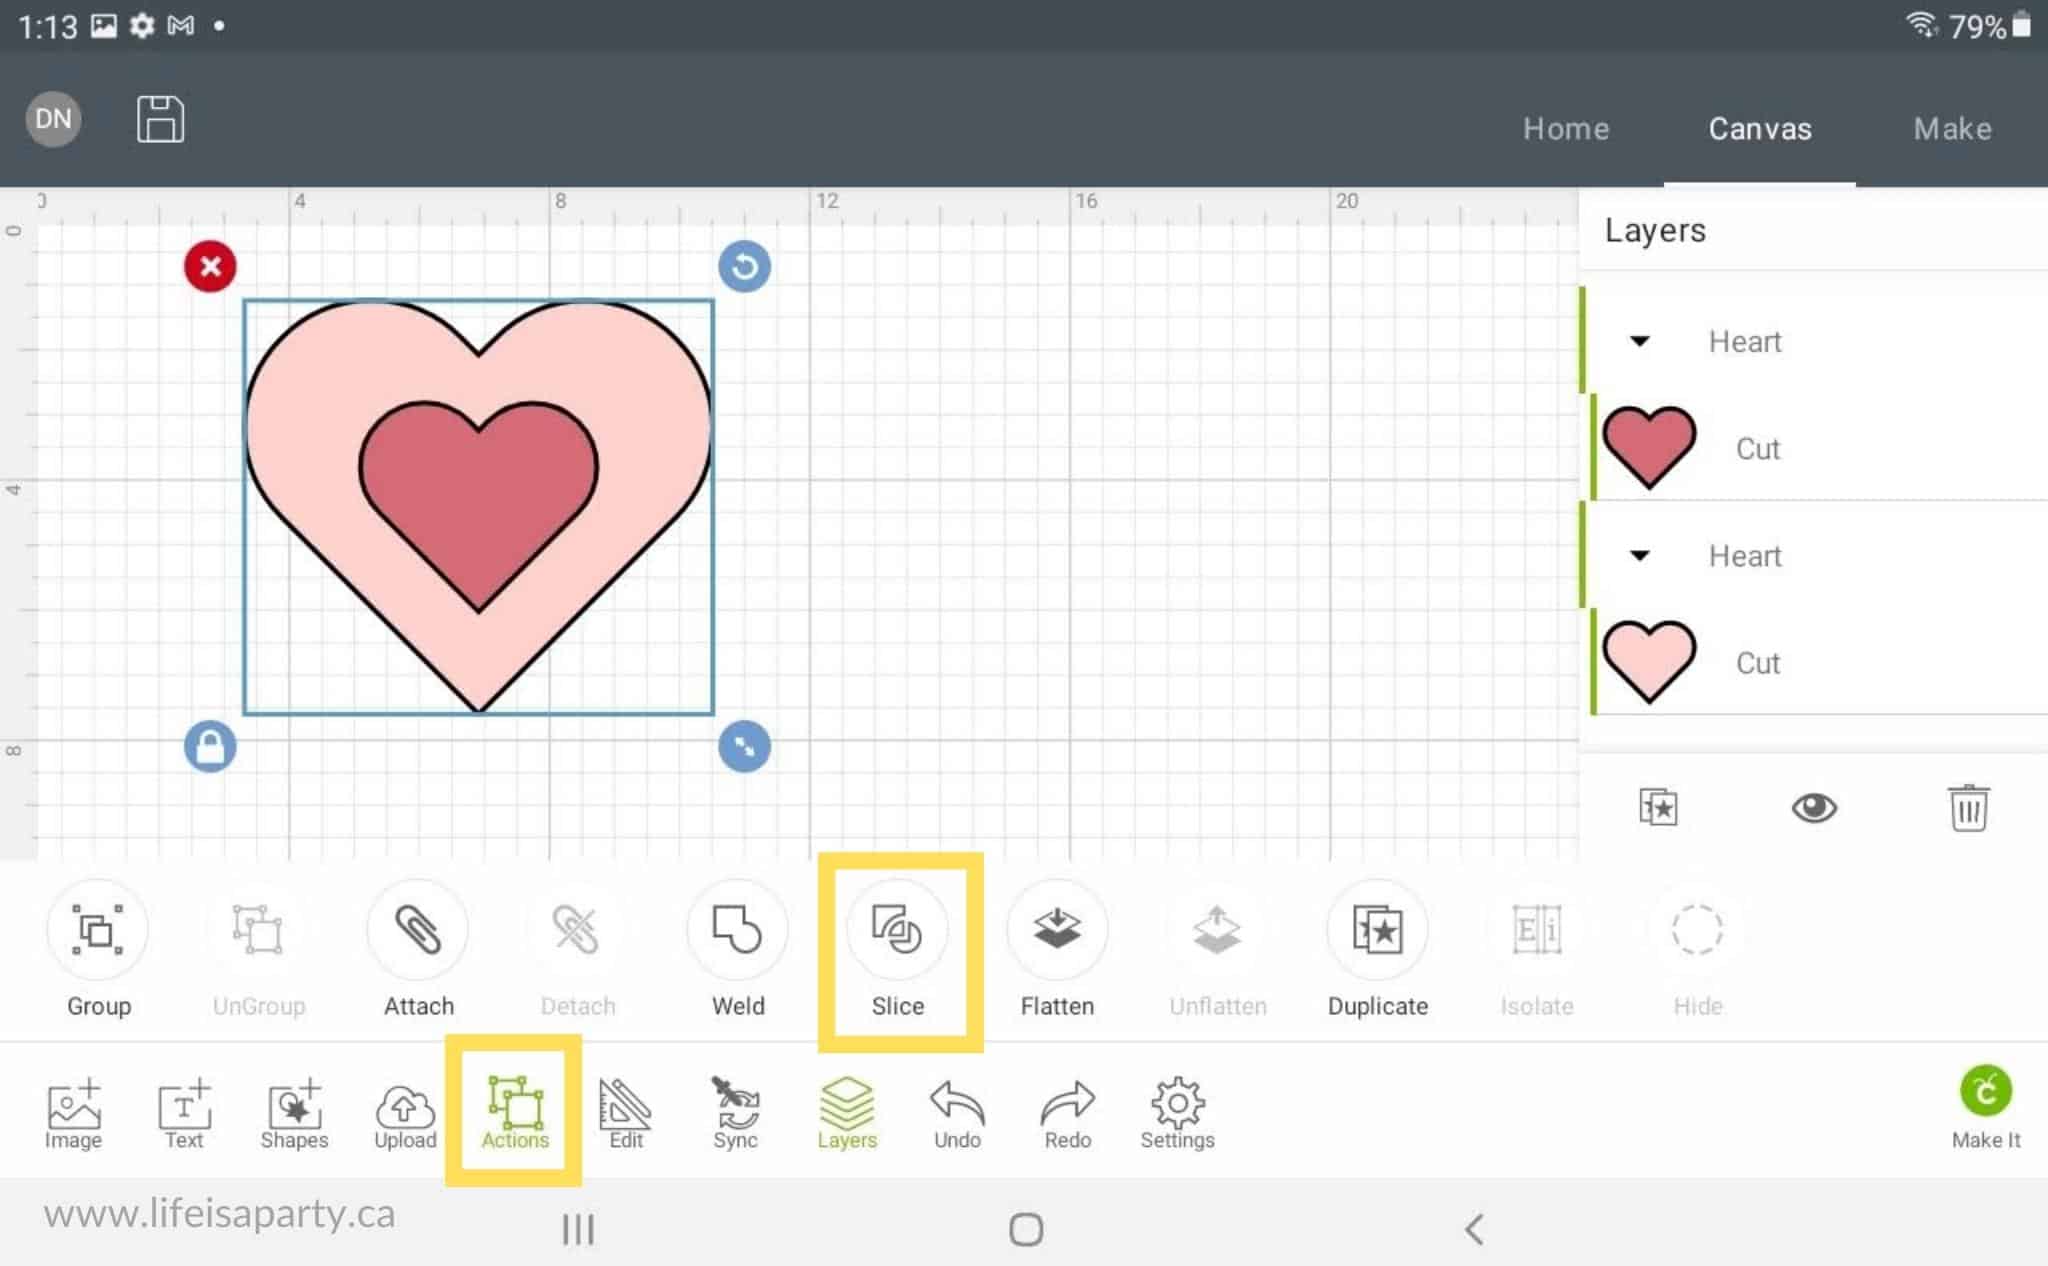
Android -on an Android device using the Cricut Design Space app you will find the slice button as part of the actions menu, so first click on the actions button, and then look for slice.
Troubleshooting Slice -Why Is Slice Grayed Out?
If your slice tool is grayed out and unavailable to select in Cricut Design Space, it's a sign to you that you aren't fitting the requirements for using it. The most common issues would be that you have more than two layers selected at once.
Remember slice only works for two layers at a time. It won't work on a single layer, and it won't work for three or more layers selected at once, so first check that you only have two overlapping layers selected.
Often when something is grouped you are not able to slice. To fix this ungroup the items, then select just two overlapping items at a time to slice them.
How To Use Slice
If you prefer to a video, check out our YouTube video here all about how to slice, and the different ways to use it.
For our first example we've added a heart to a new canvas from the free shapes.
Next, select the text tool and type out a word or phrase to add it to your canvas. You can change the font to one of your own or use one of the free fonts, or size to fit your design.
Then position the text over the heart, and make sure both the heart and the text are selected.

Click the Cricut slice tool, at the lower right of the canvas, at the bottom of the layers panel, on desktop.
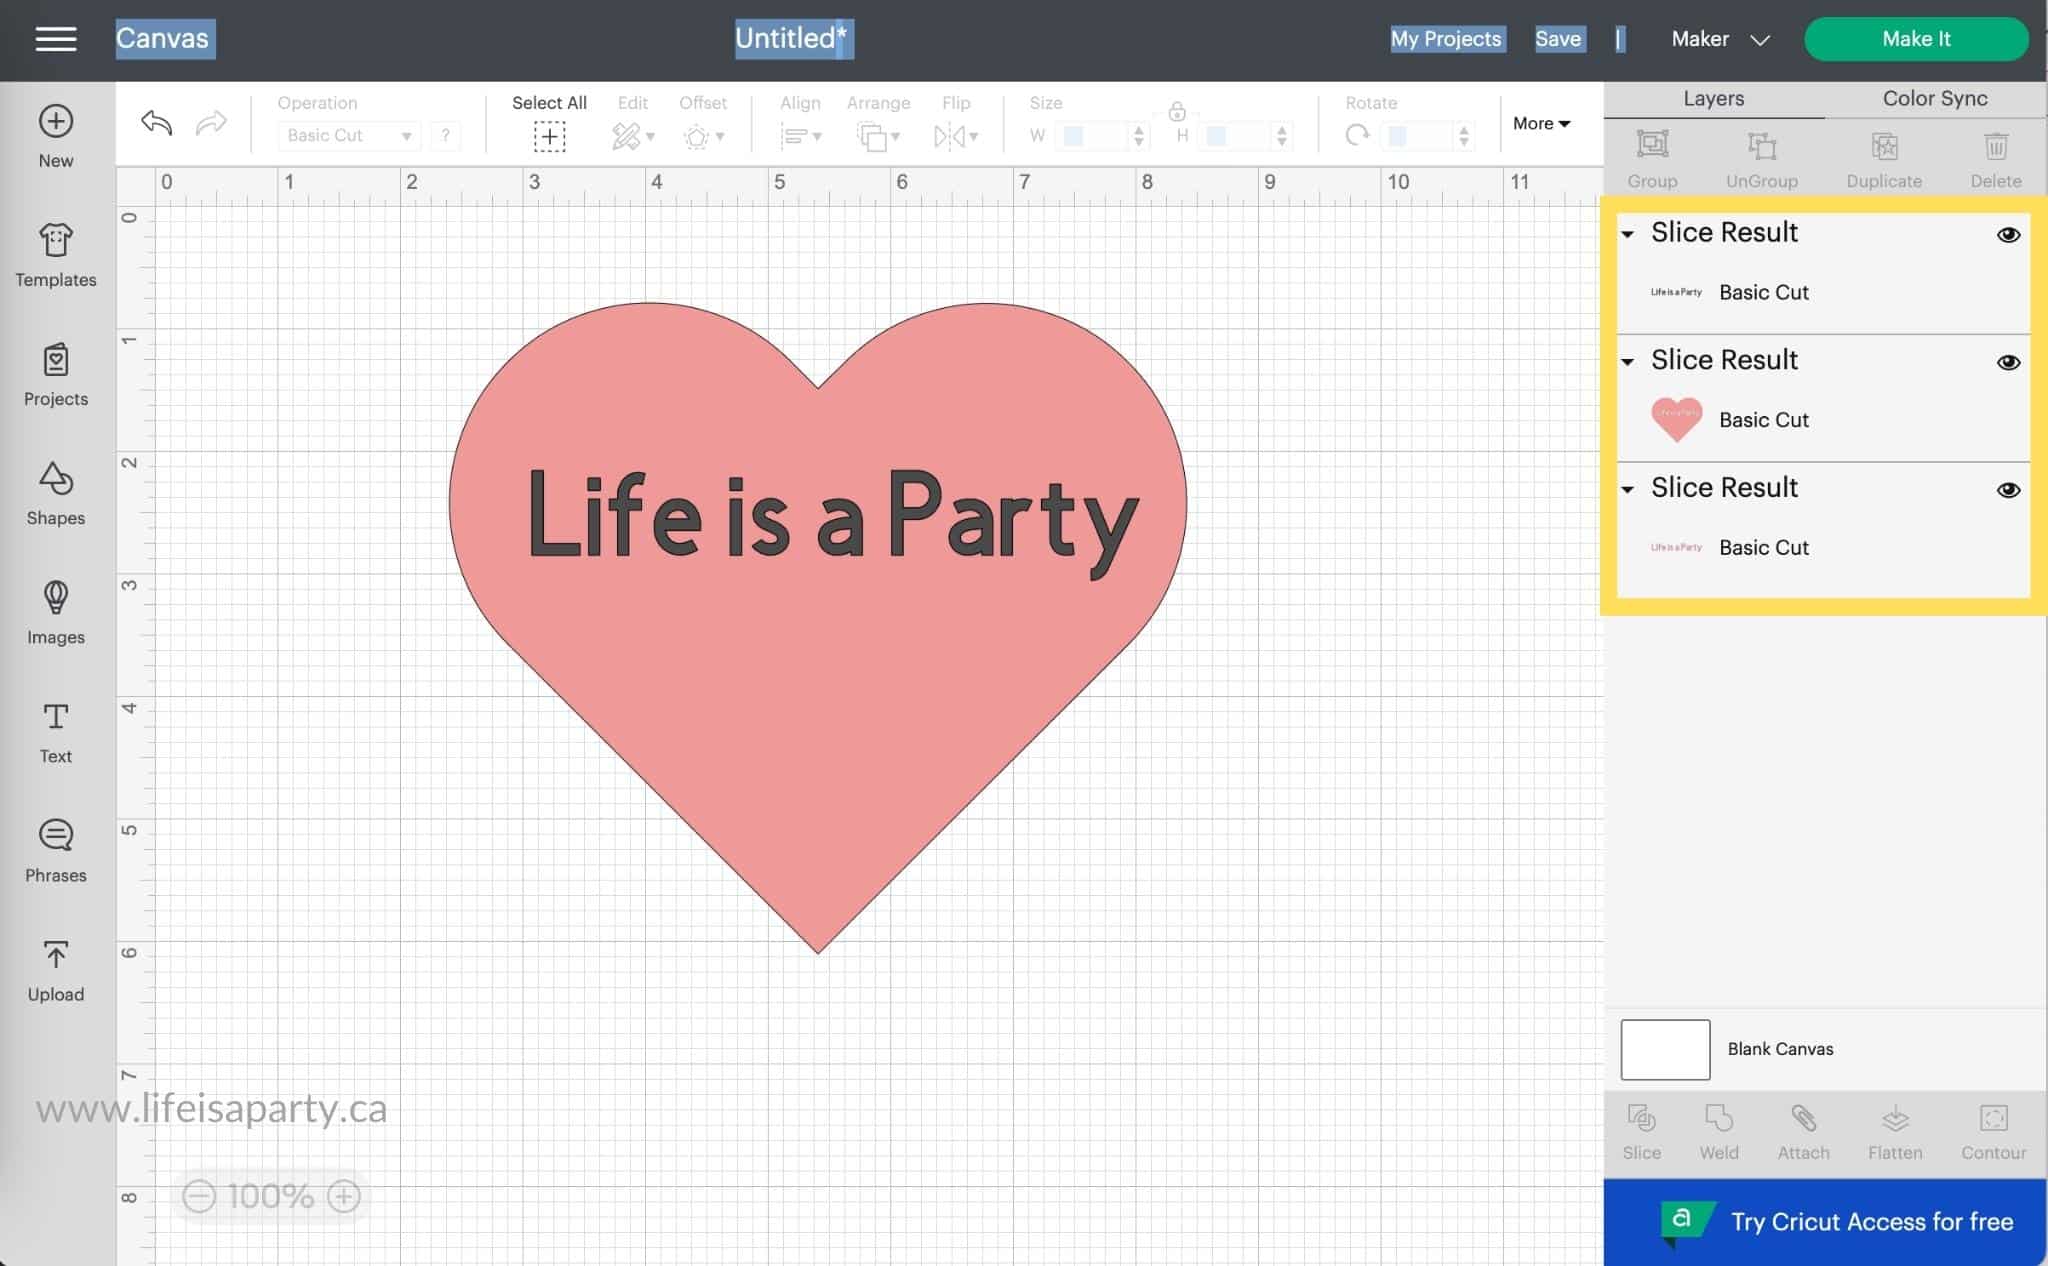
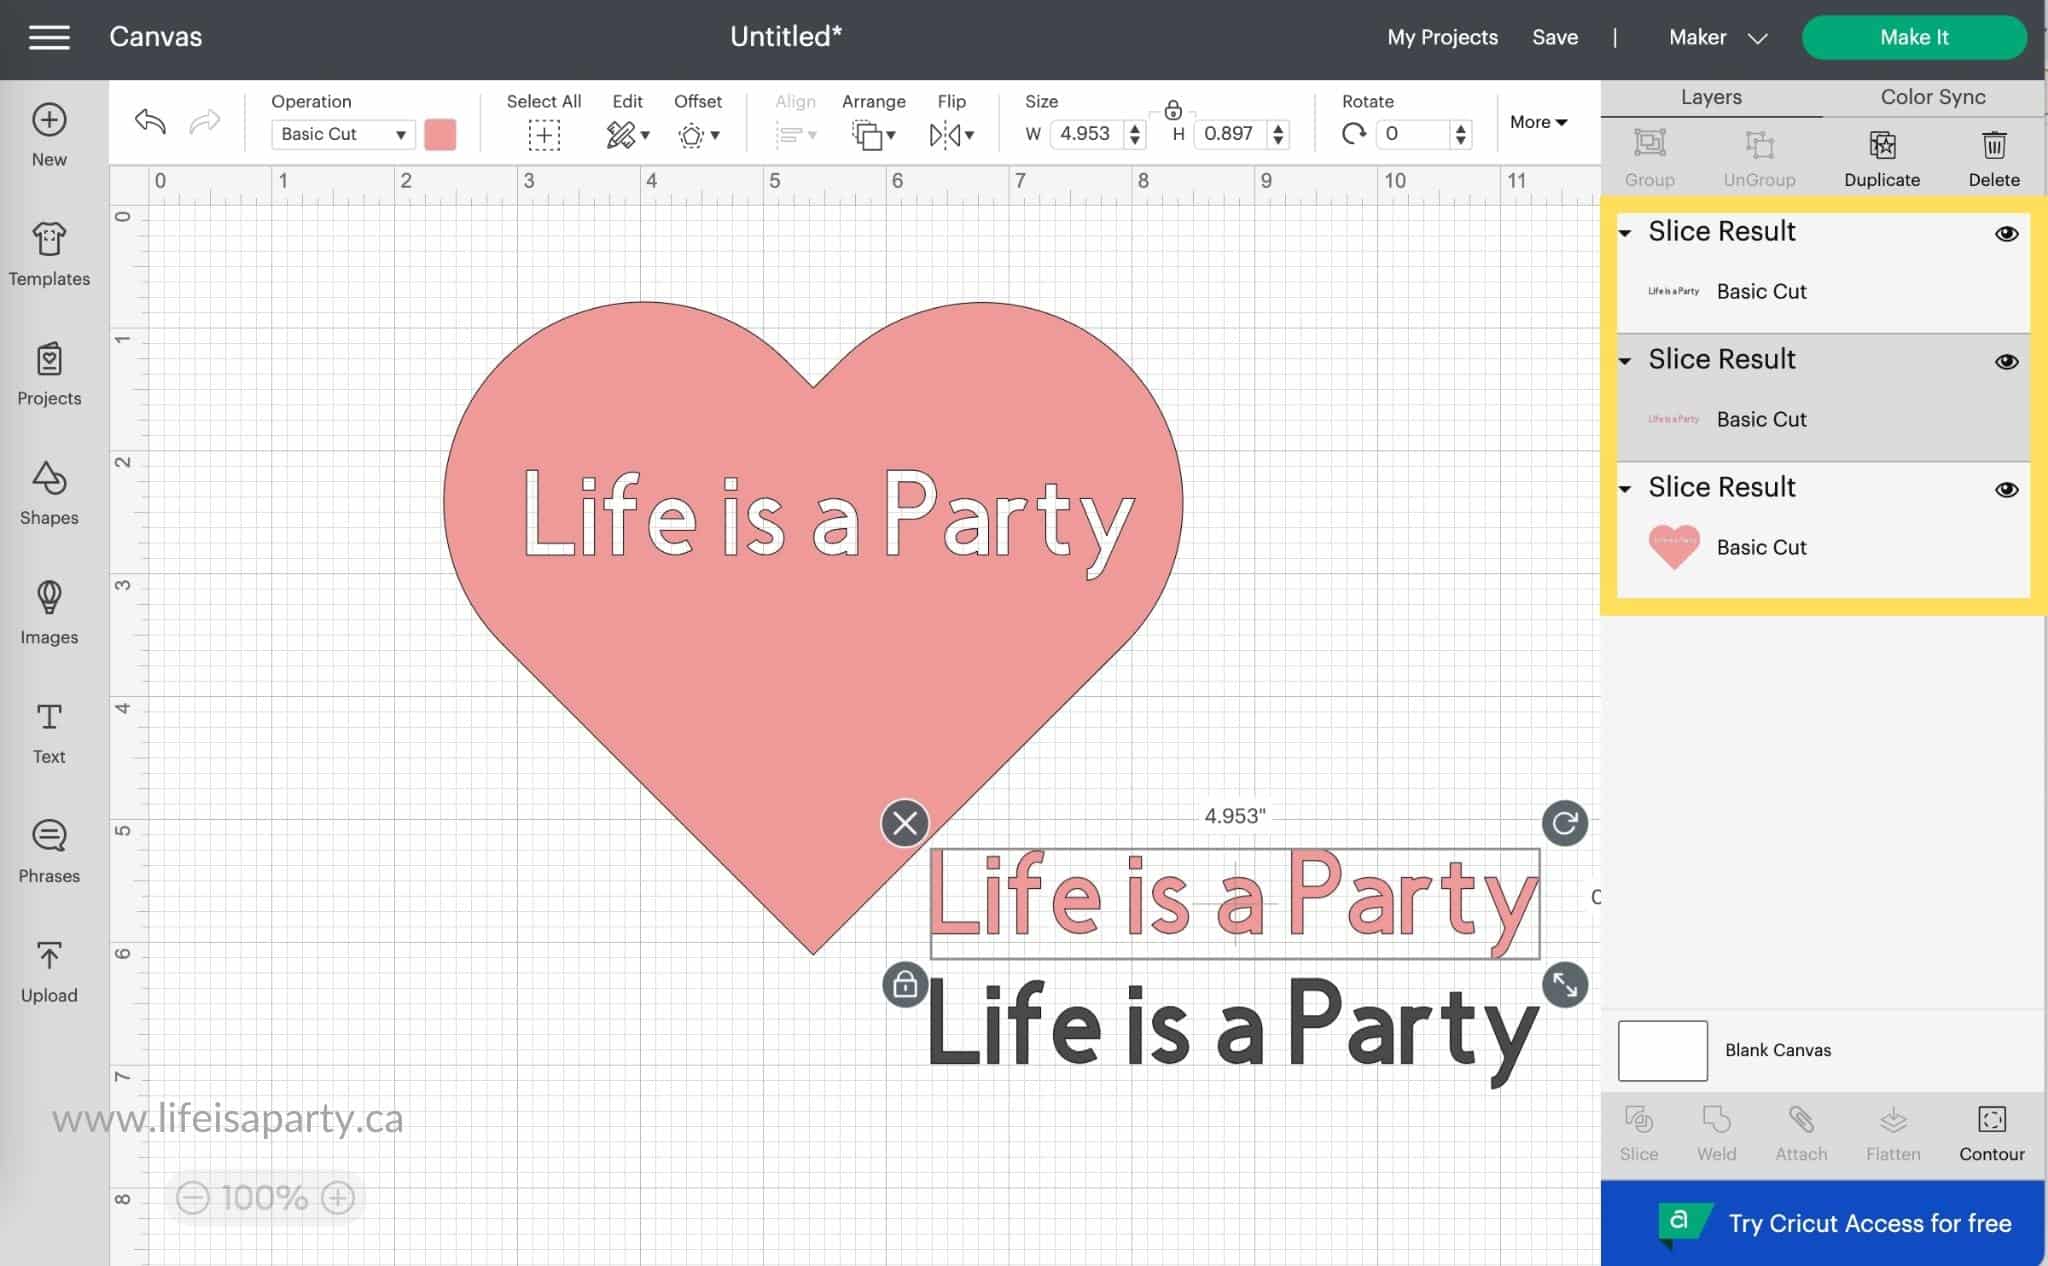
After the slice, you will see the "slice results" in the layers panel. You will have three different parts now -the original shape that is now sliced, for us the heart with the the text cut out of it. There will also be the text that was sliced out of the heart -which is the pink text for our example. And lastly there is the original black text.
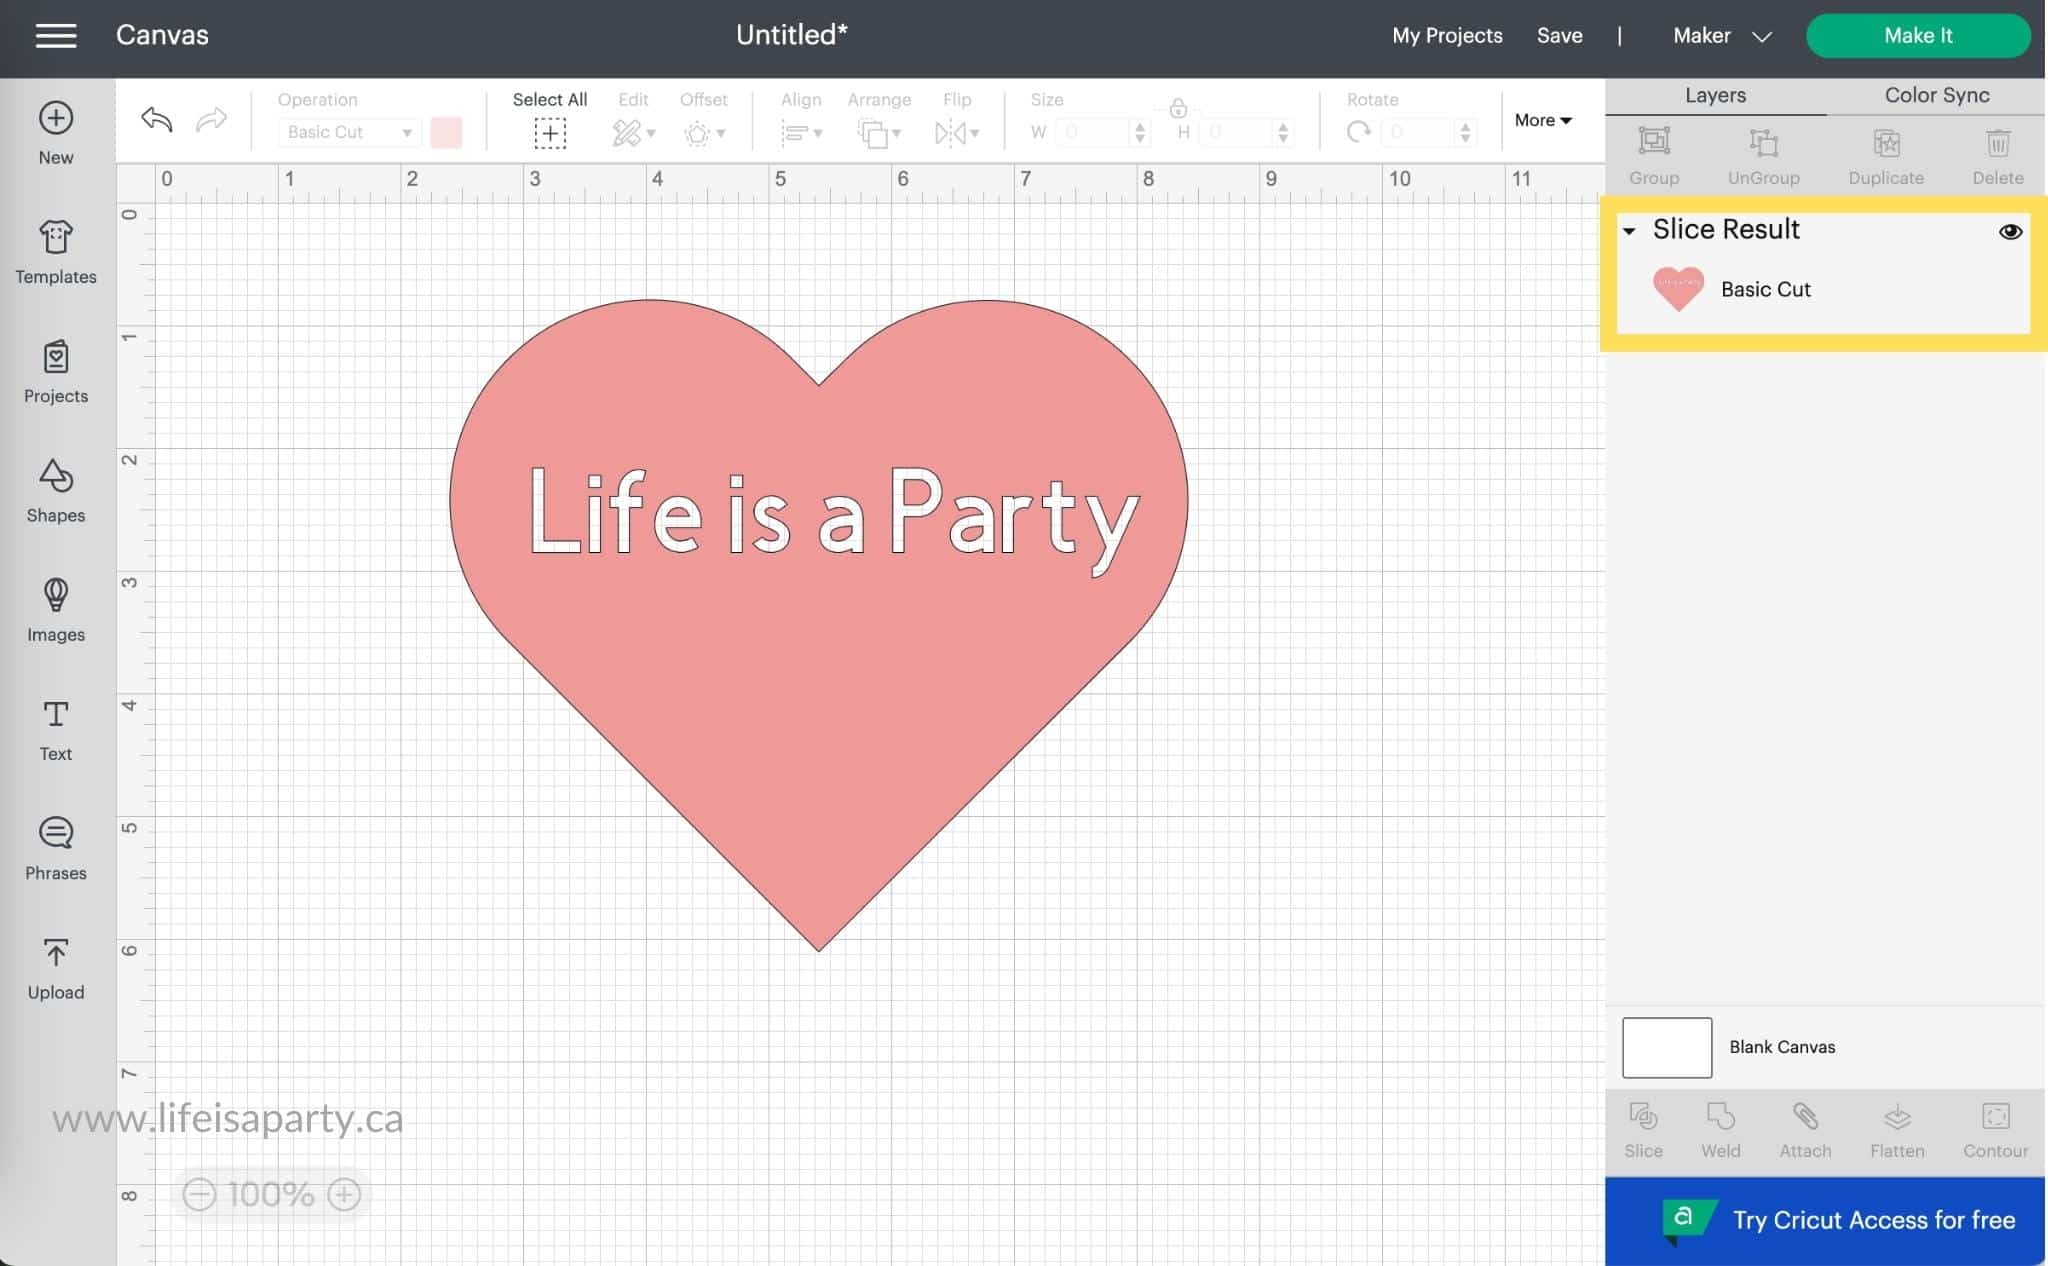
We can delete the pink and black text and we're left with the new design with the text sliced out of it.
Using Slice To Crop An Object
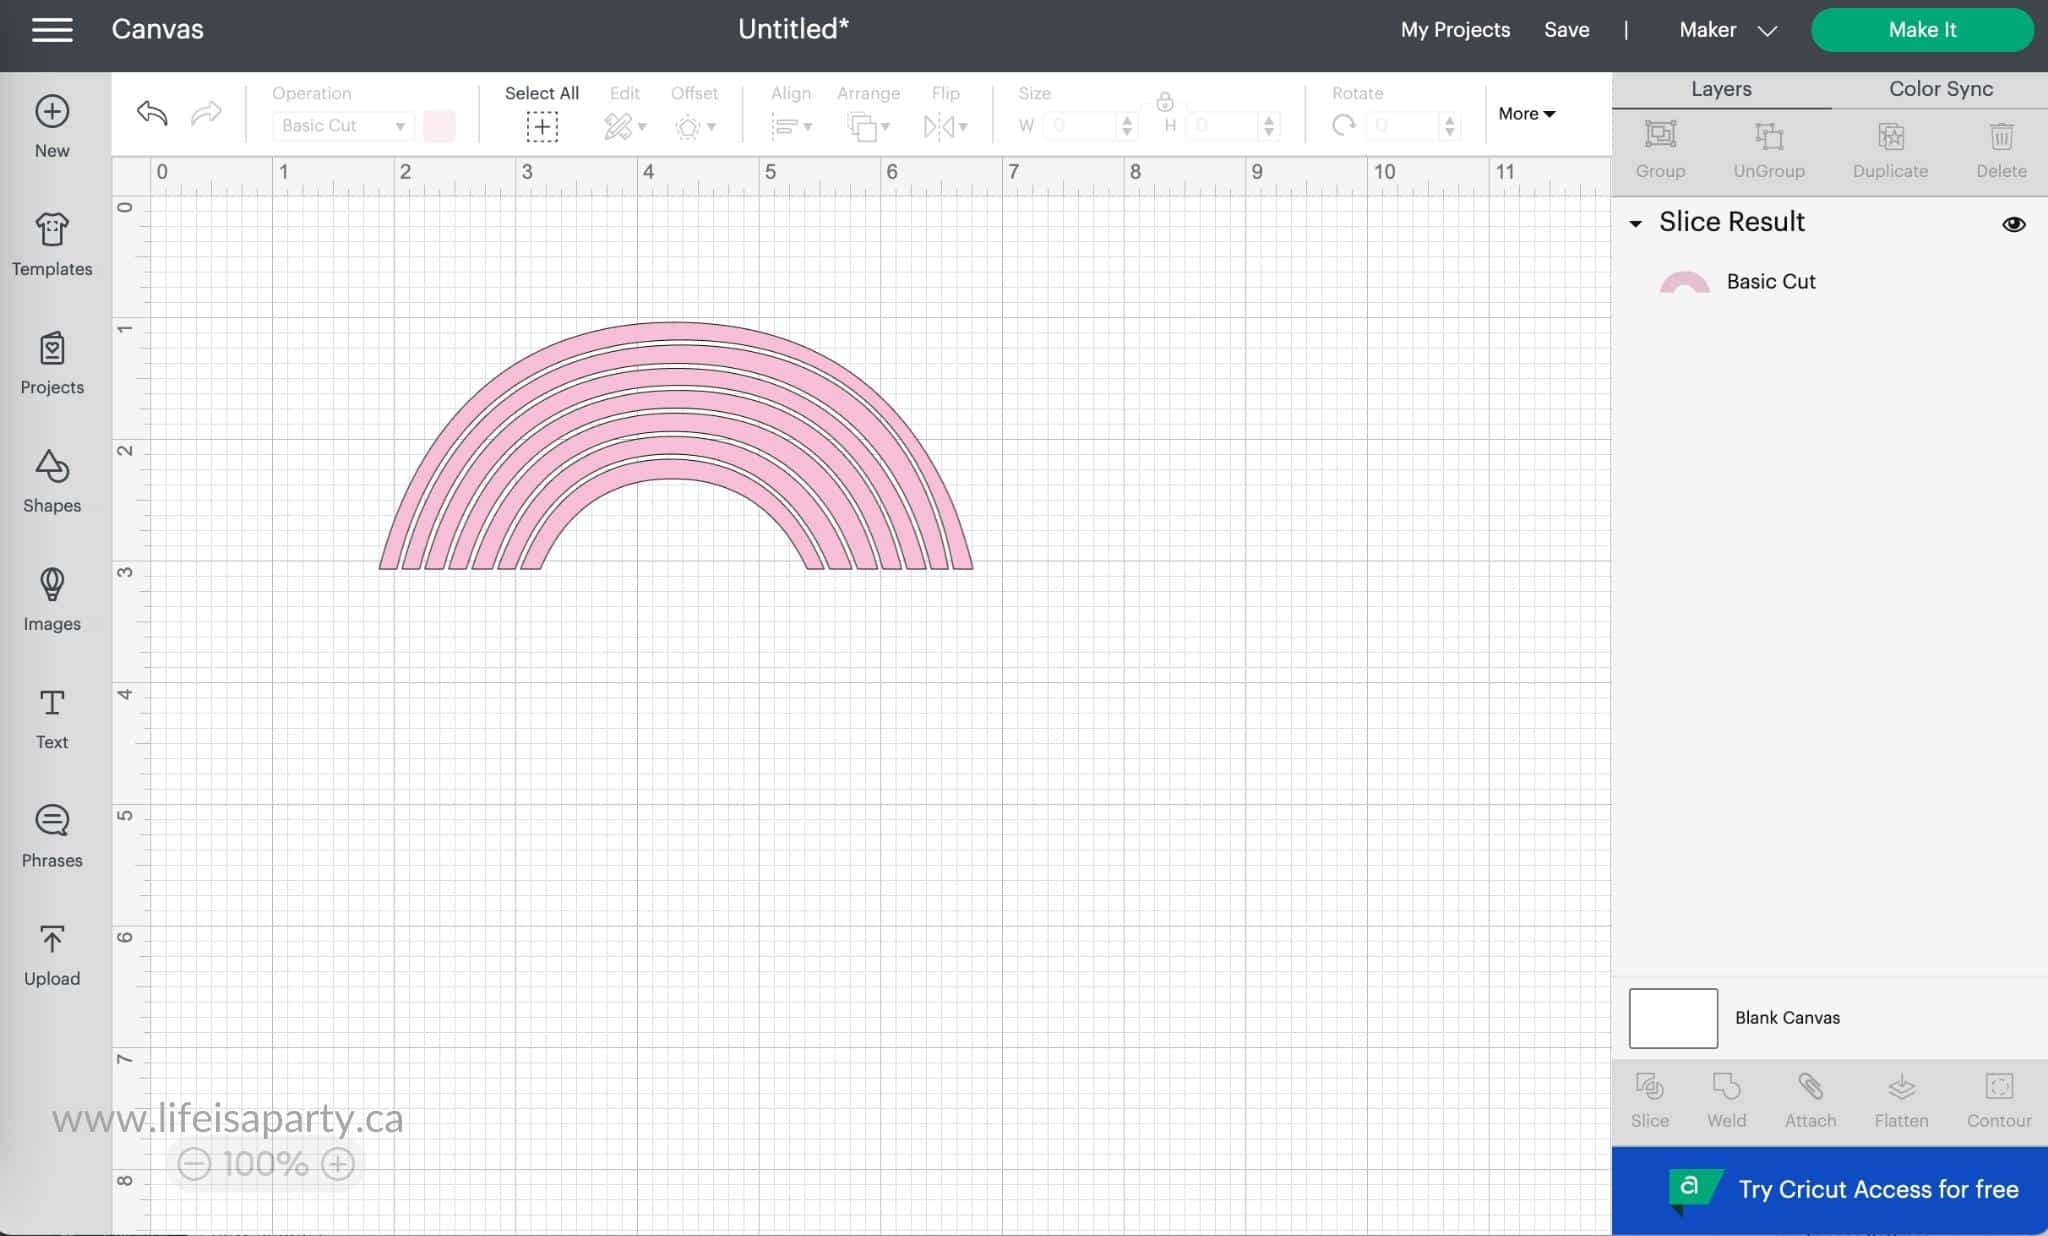
Sometimes if you're using someone else's image cut file, or a image from Design Space, there may be elements of it that you would like to crop out.
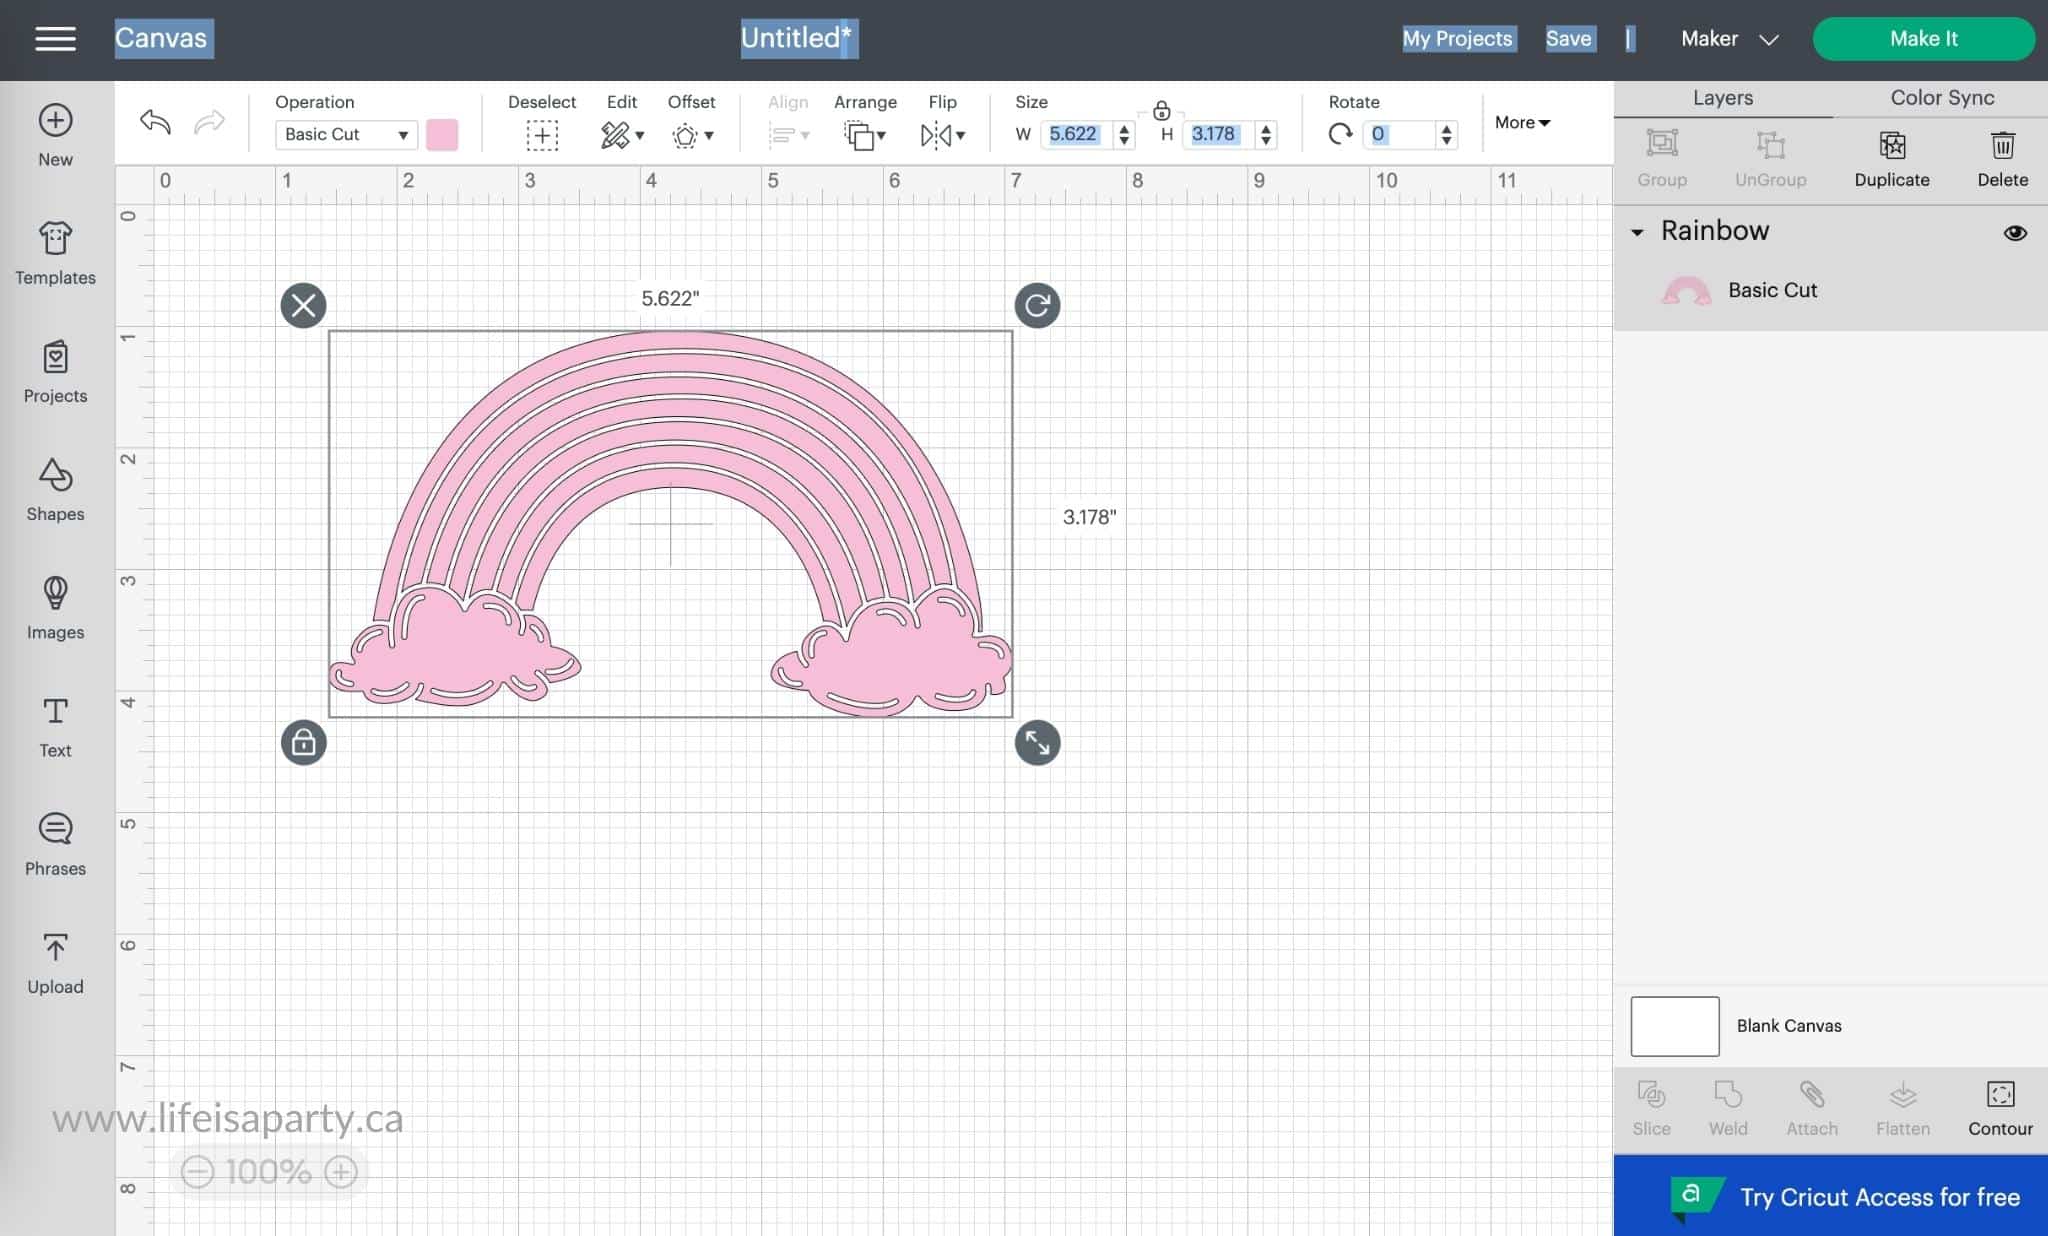
To do this in Cricut Design Space all you have to do is select a free shape by clicking on shapes and selecting one that will cover what you want to crop. Next, when it appears on your canvas, adjust the size and place it over top of what you'd like to crop out.
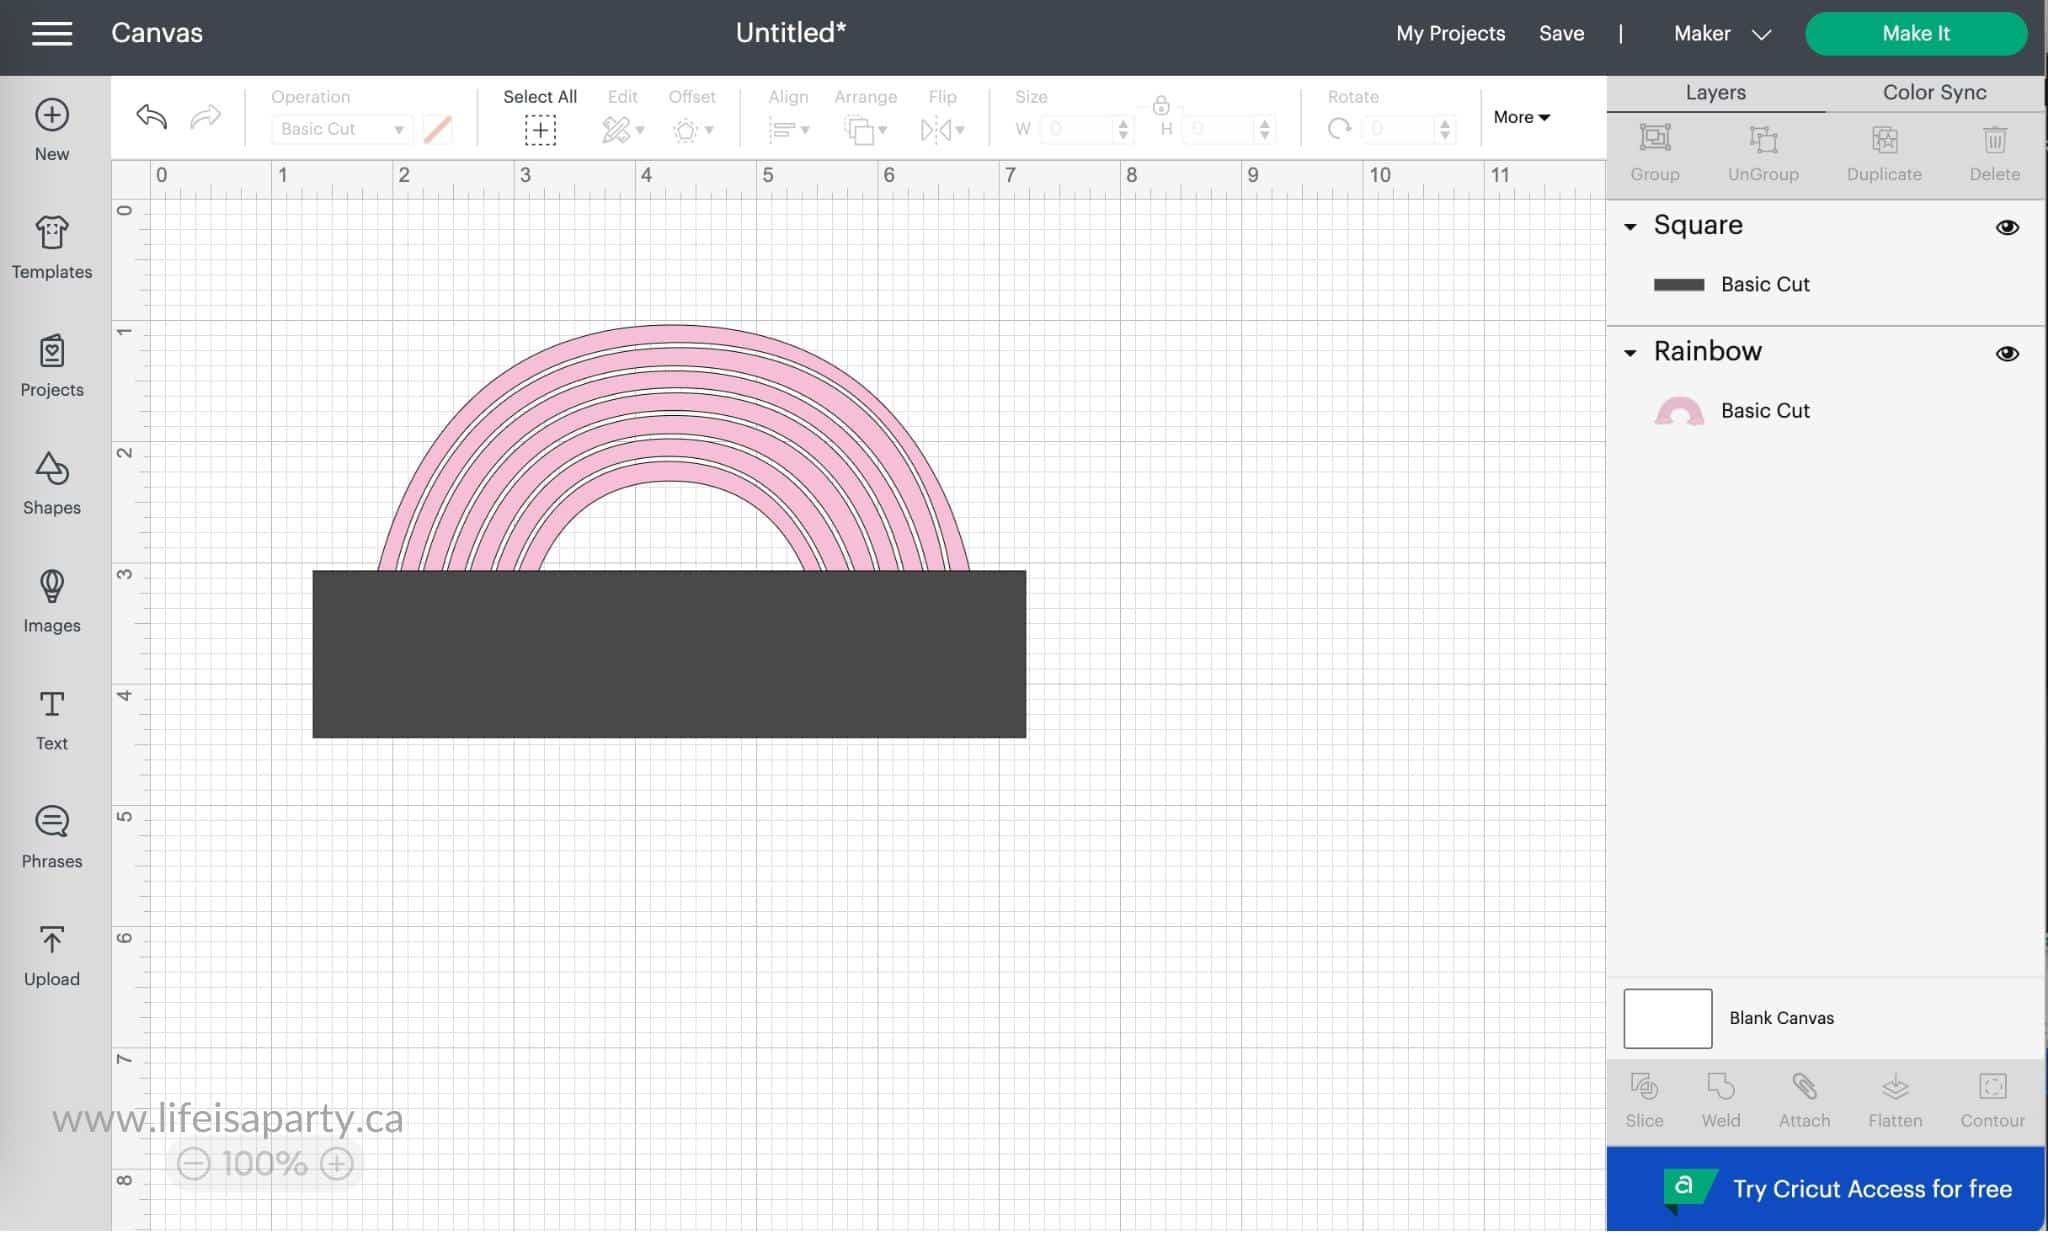
Then select the item layer, and the shape layer and press the slicing tool button. This will create new cut paths .Look for the slice result in the layers panel and use delete to remove the slice result and the original shape.
Using Slice To Create New Shapes
Sometimes when you are designing you want a shape that isn't available in the free shapes menu library. You can often create the shape yourself from two different shapes using slice and/or the weld tool to create your own new shapes at no additional cost.
The first thing to do to create a crescent moon shape from free shapes is to start with a new canvas, and then add a circle shape. Next use the duplicate button to add another circle to the canvas. Now position the circles so that they are overlapping to create a crescent moon.
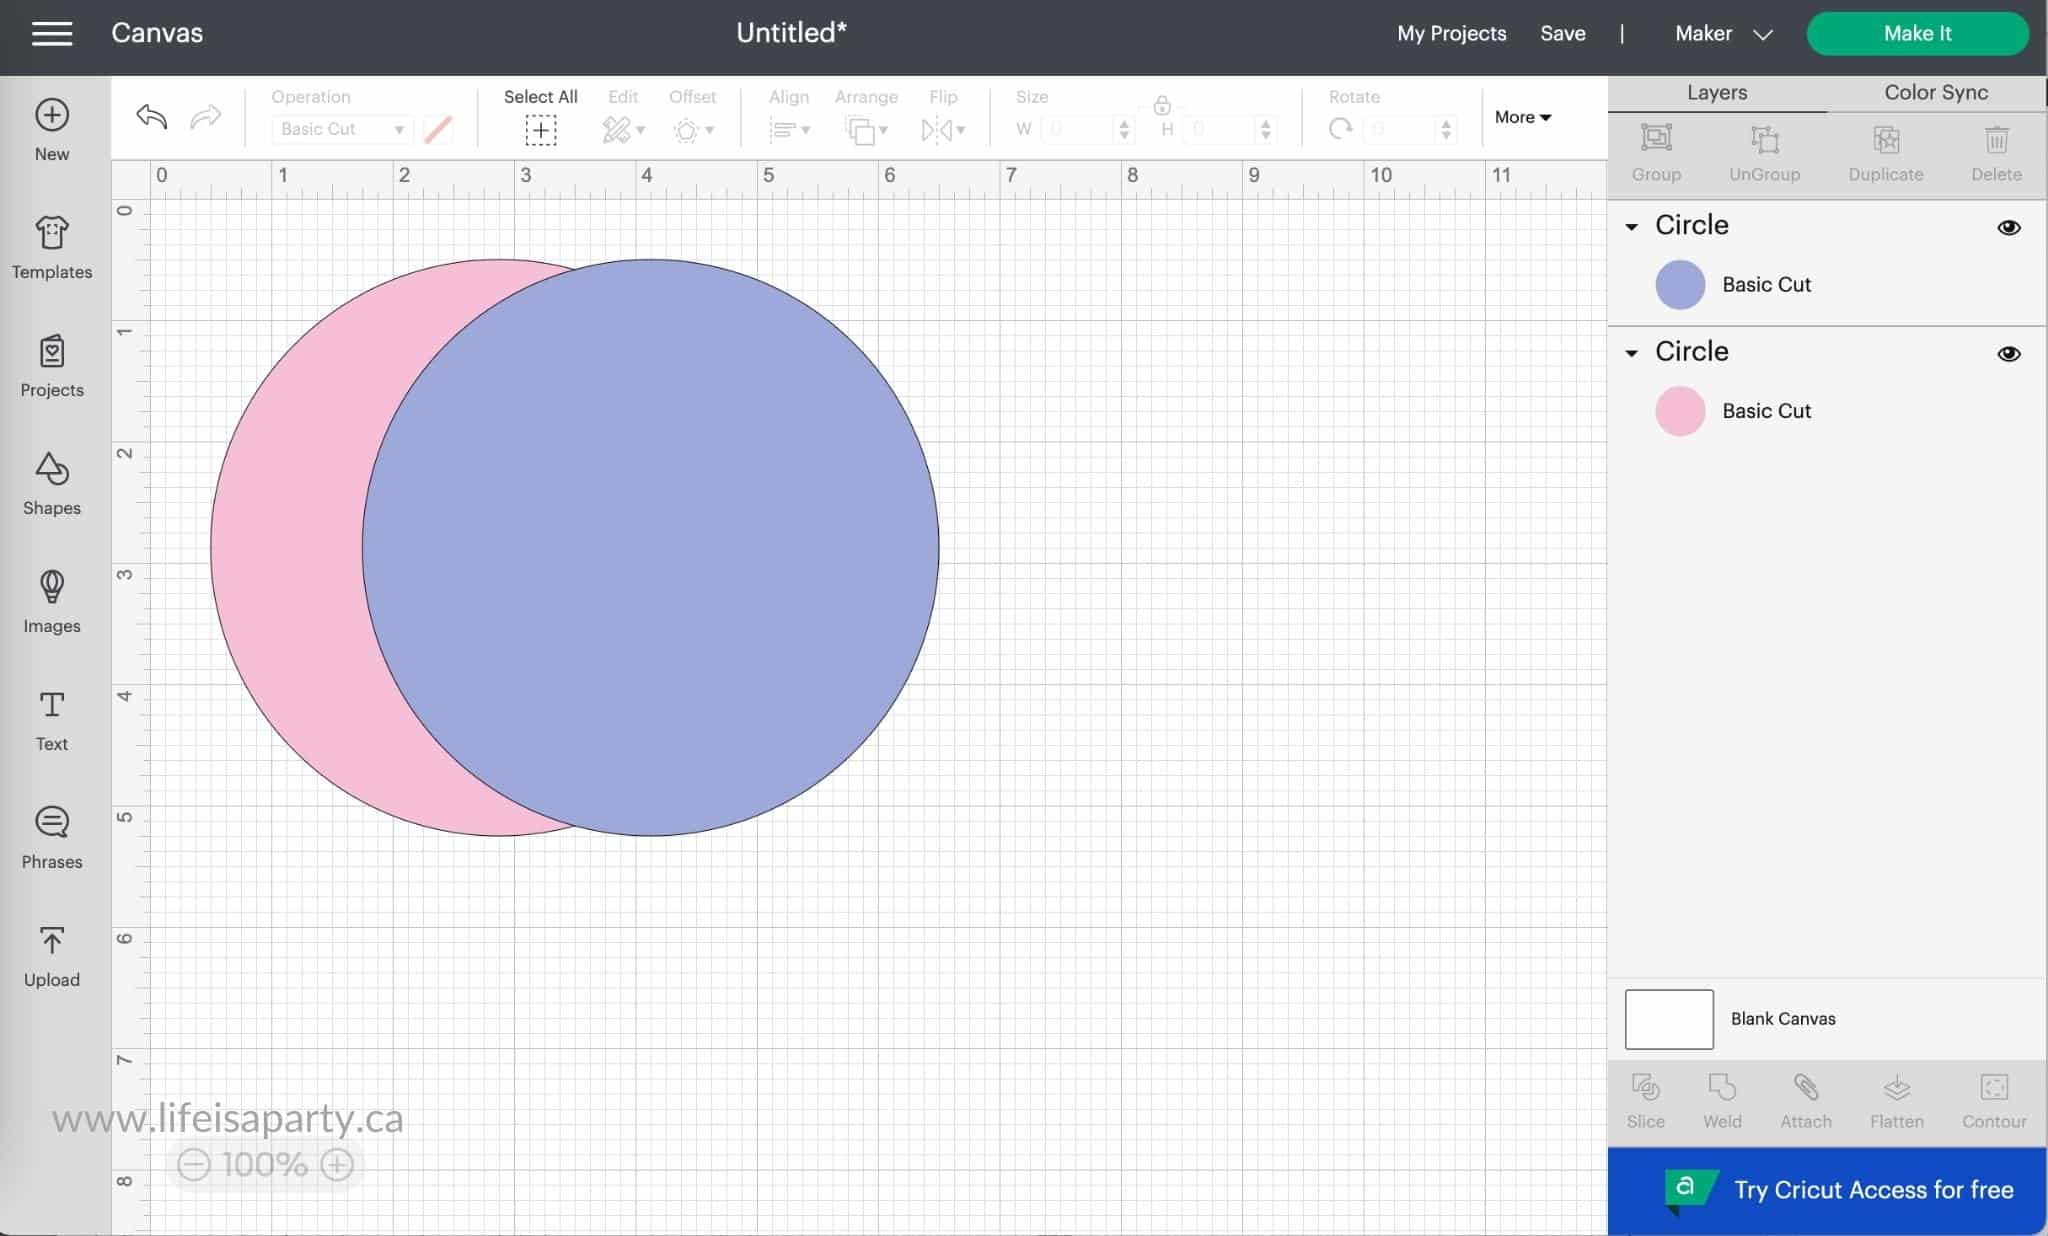
Select both layers and choose the slice feature. You will be left with a new crescent shape, along with the the other two slice results. You can delete the results you don't want and use the new free crescent shape moon design in your Cricut projects.
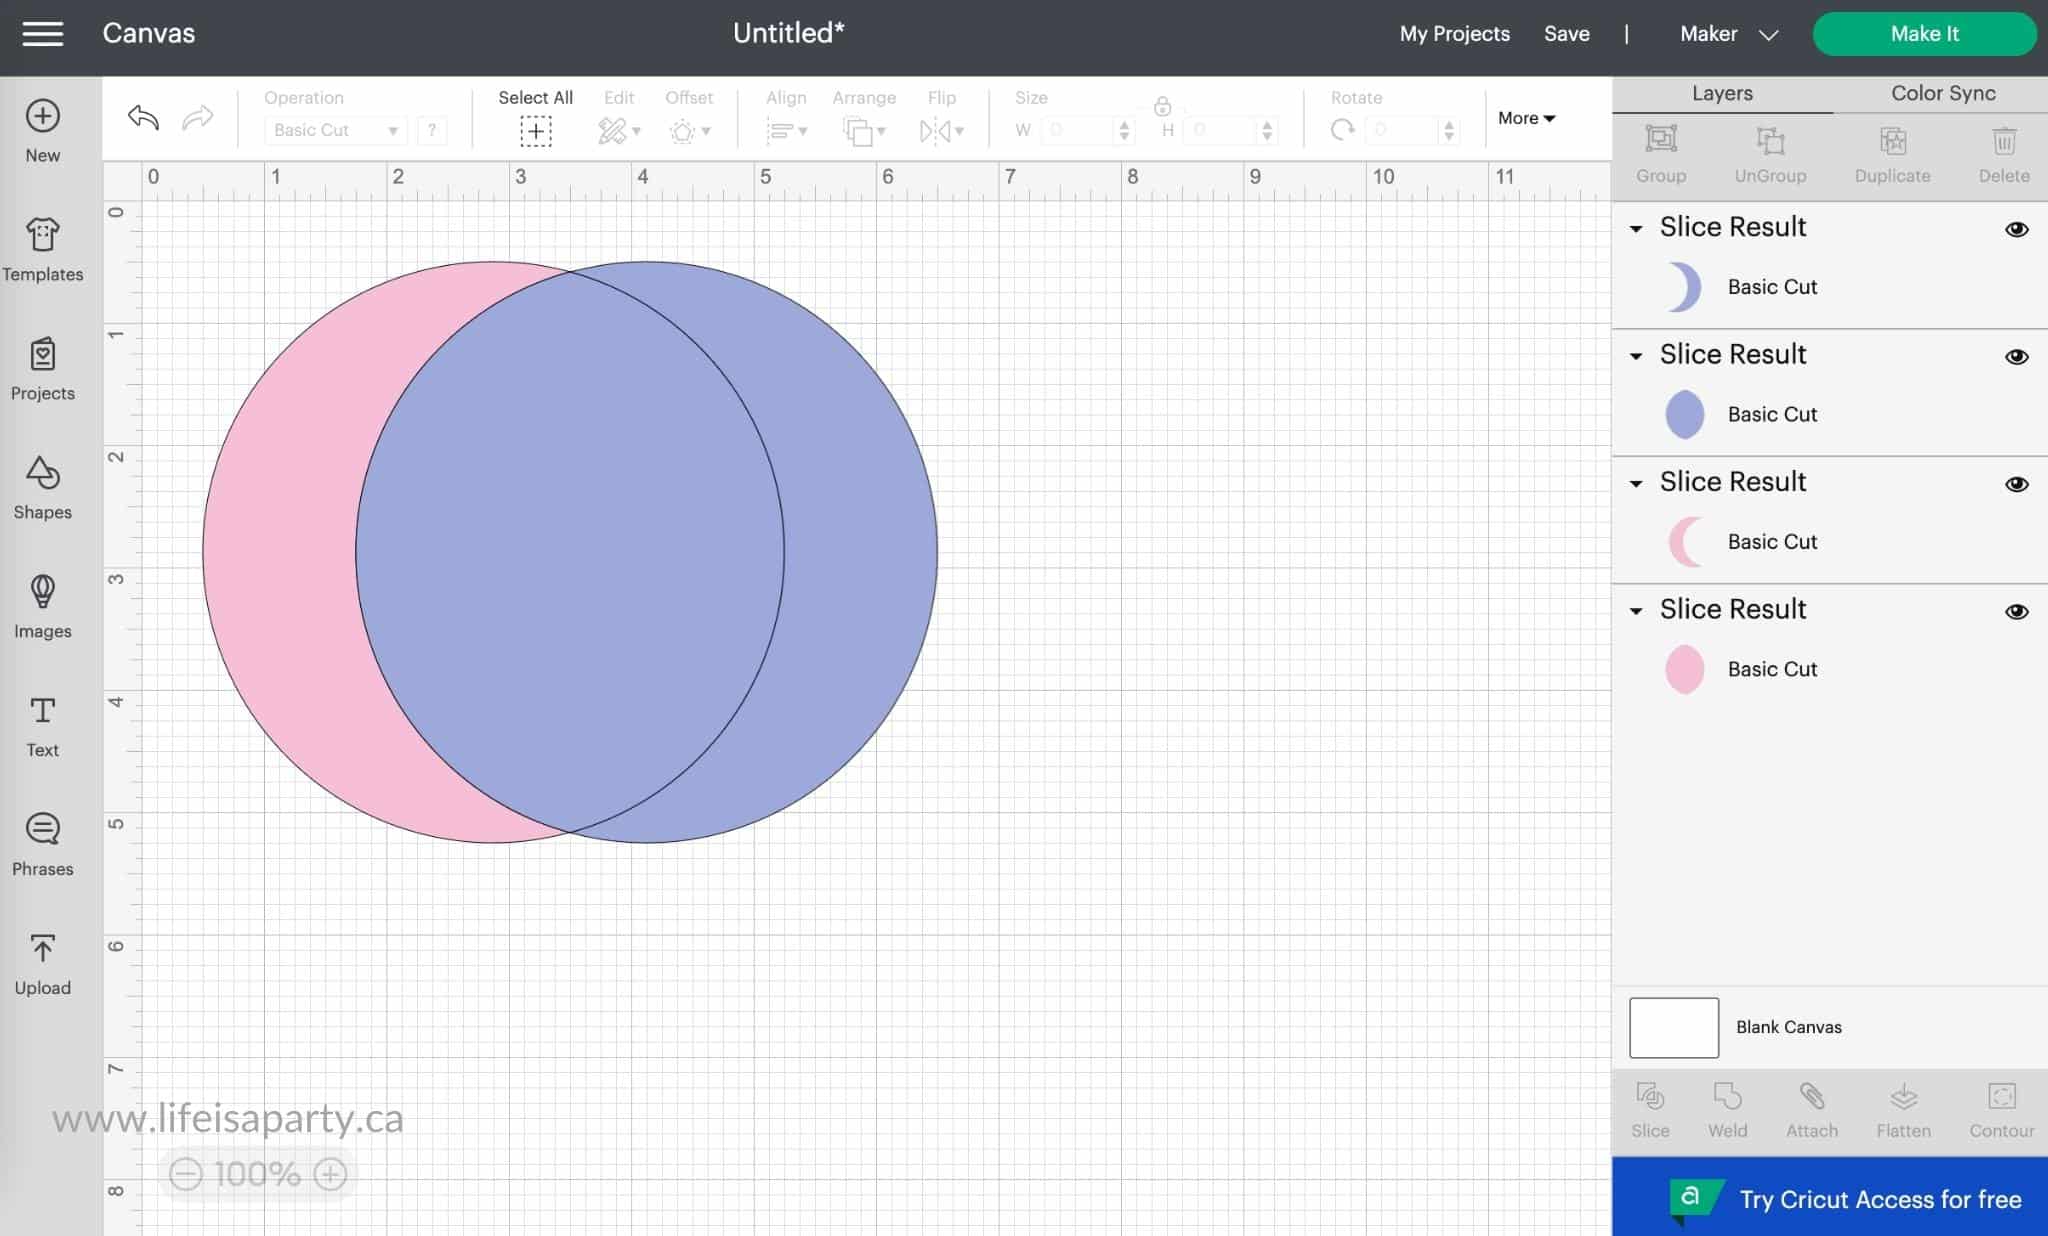
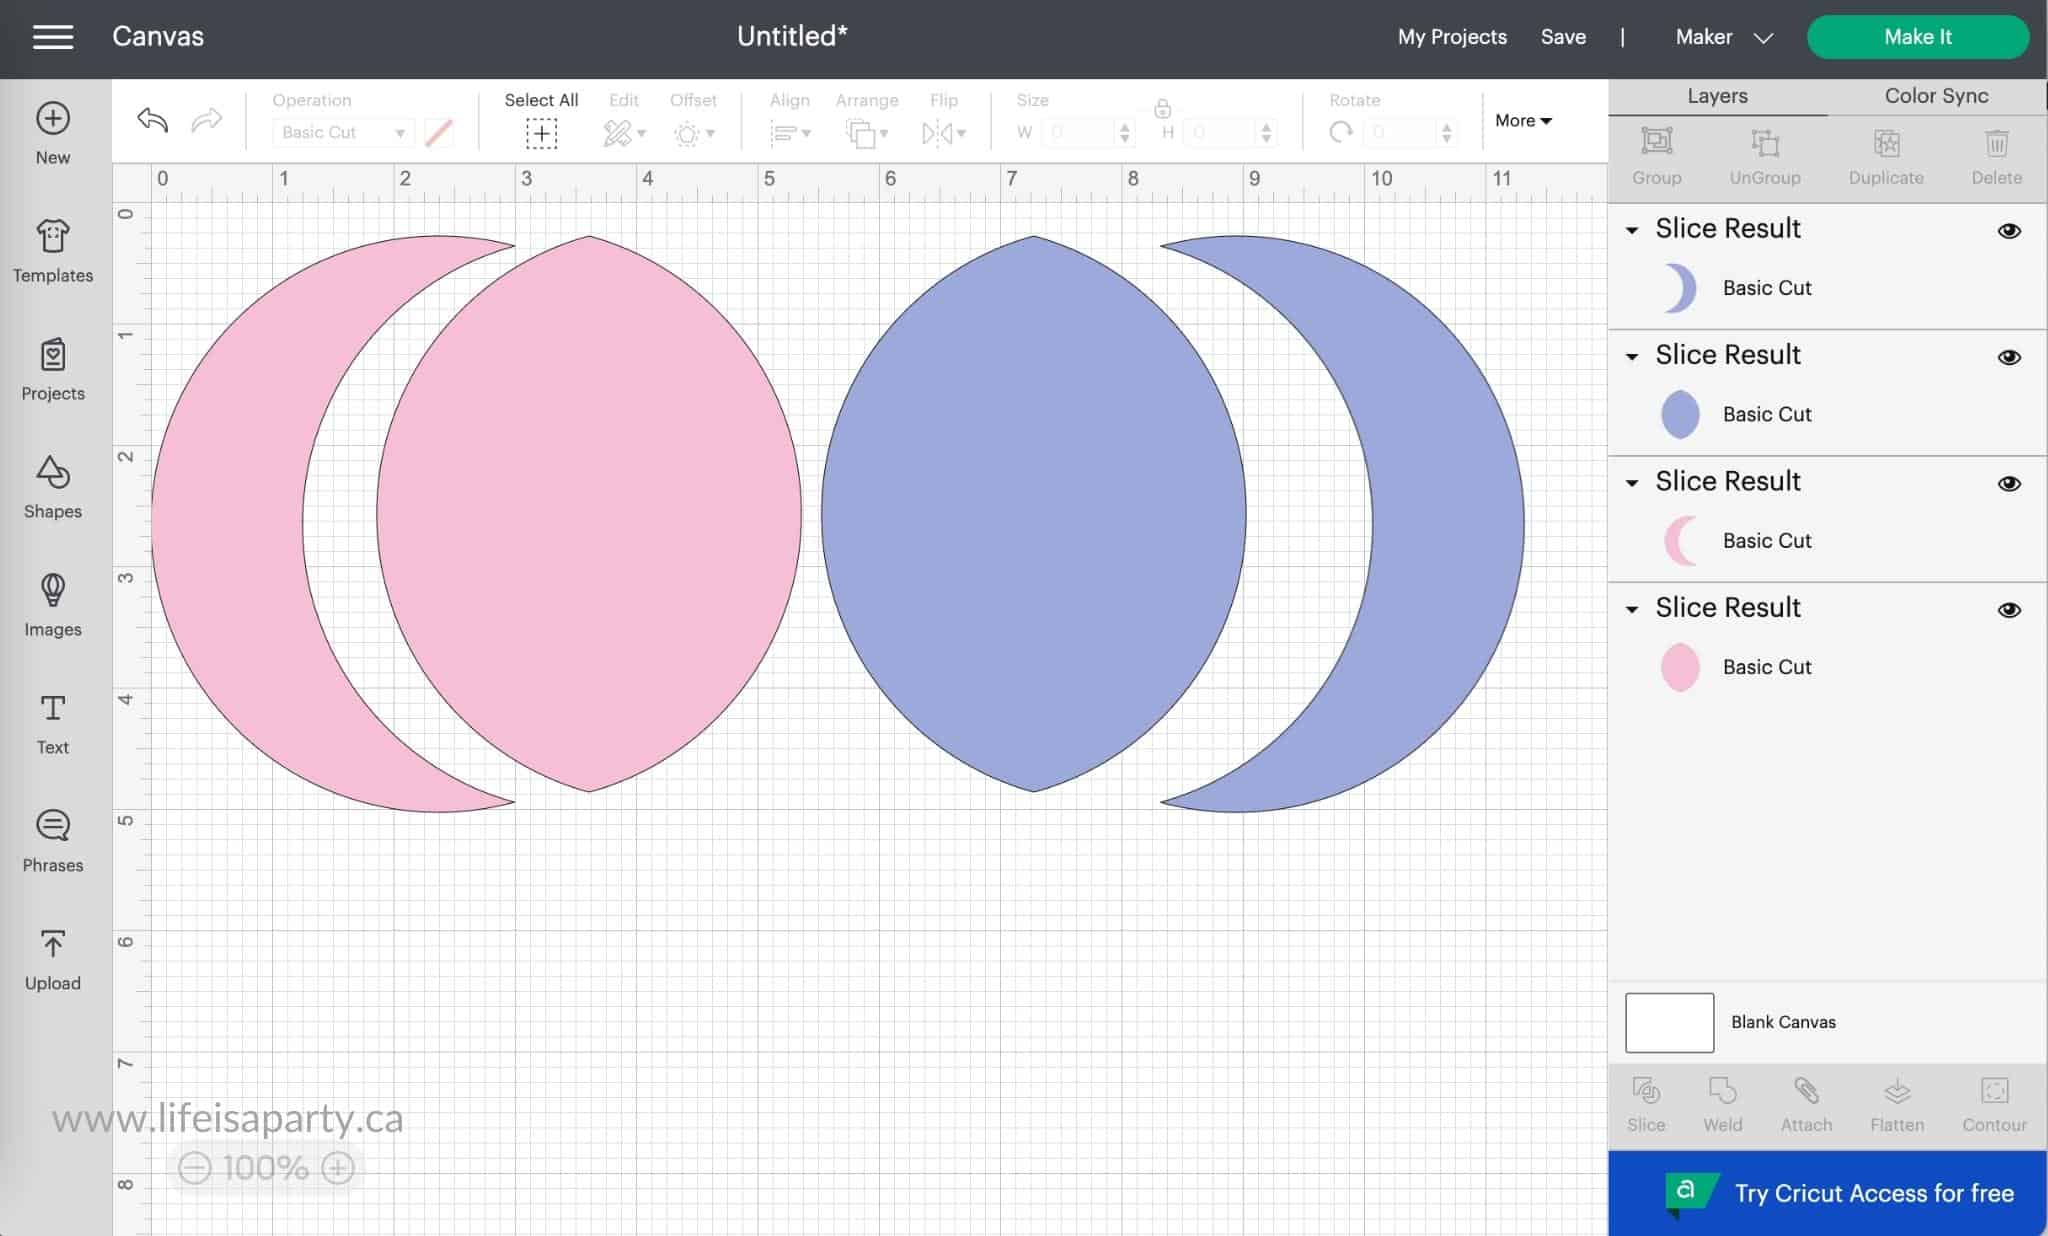
This example is quite simple, but you can also use this method for more complex designs with multiple slices, and also welding pieces together to create lots more new shapes.
Using Slice To Cut An Item Into Multiple Items
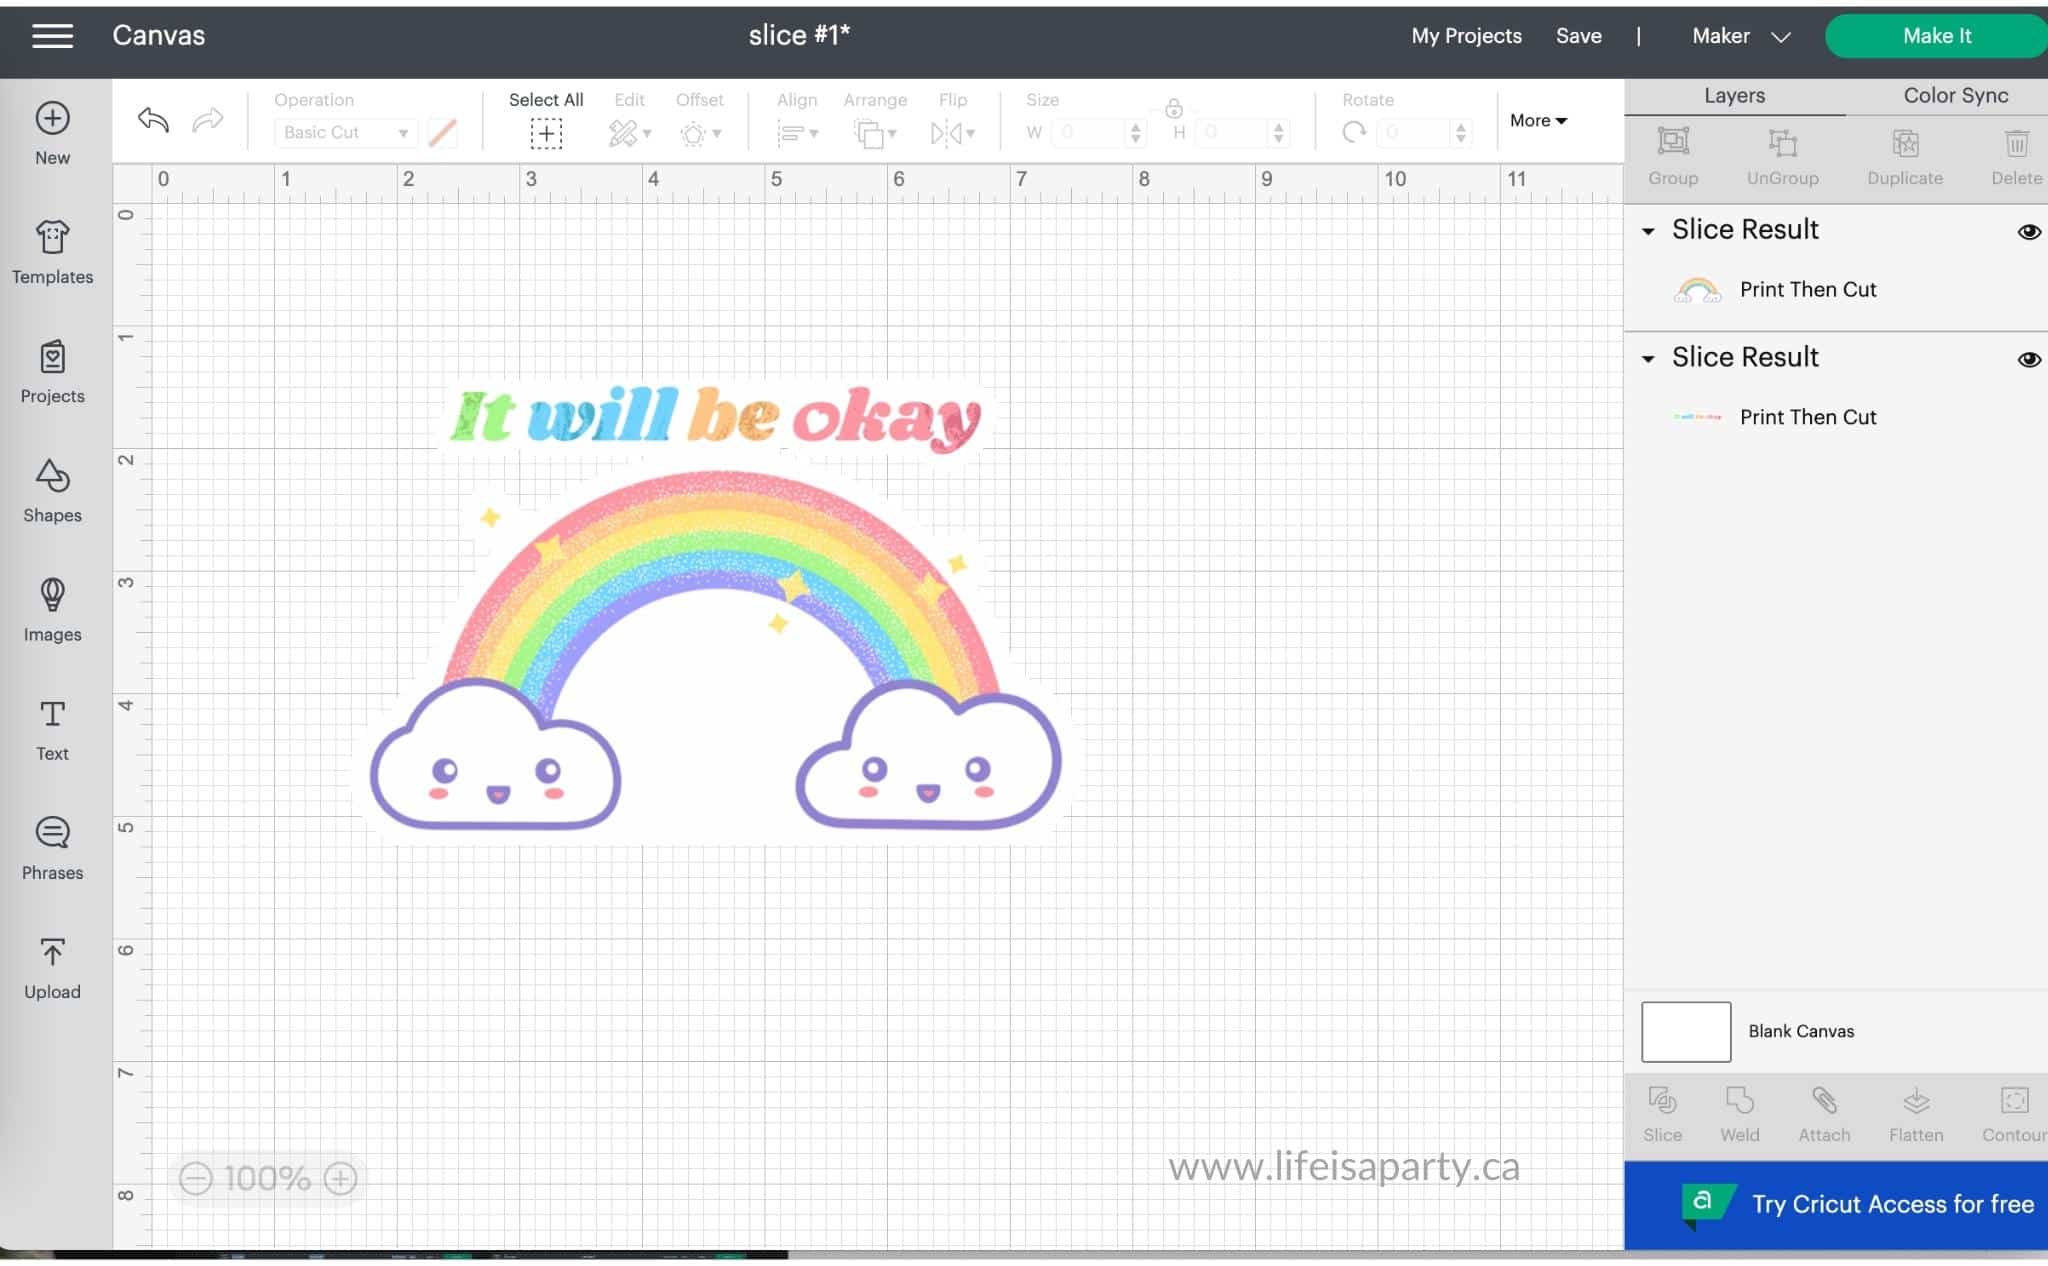
Sometimes when you're using already made images from someone else, or Cricut Design Space there are elements that you would like to move around, but the item is a single-layer image, so you can not select certain elements and move them. The slice option is a great tool to help. As we did with the cropping example, we start by selecting a shape from the free simple shapes library that covers what we want to slice.
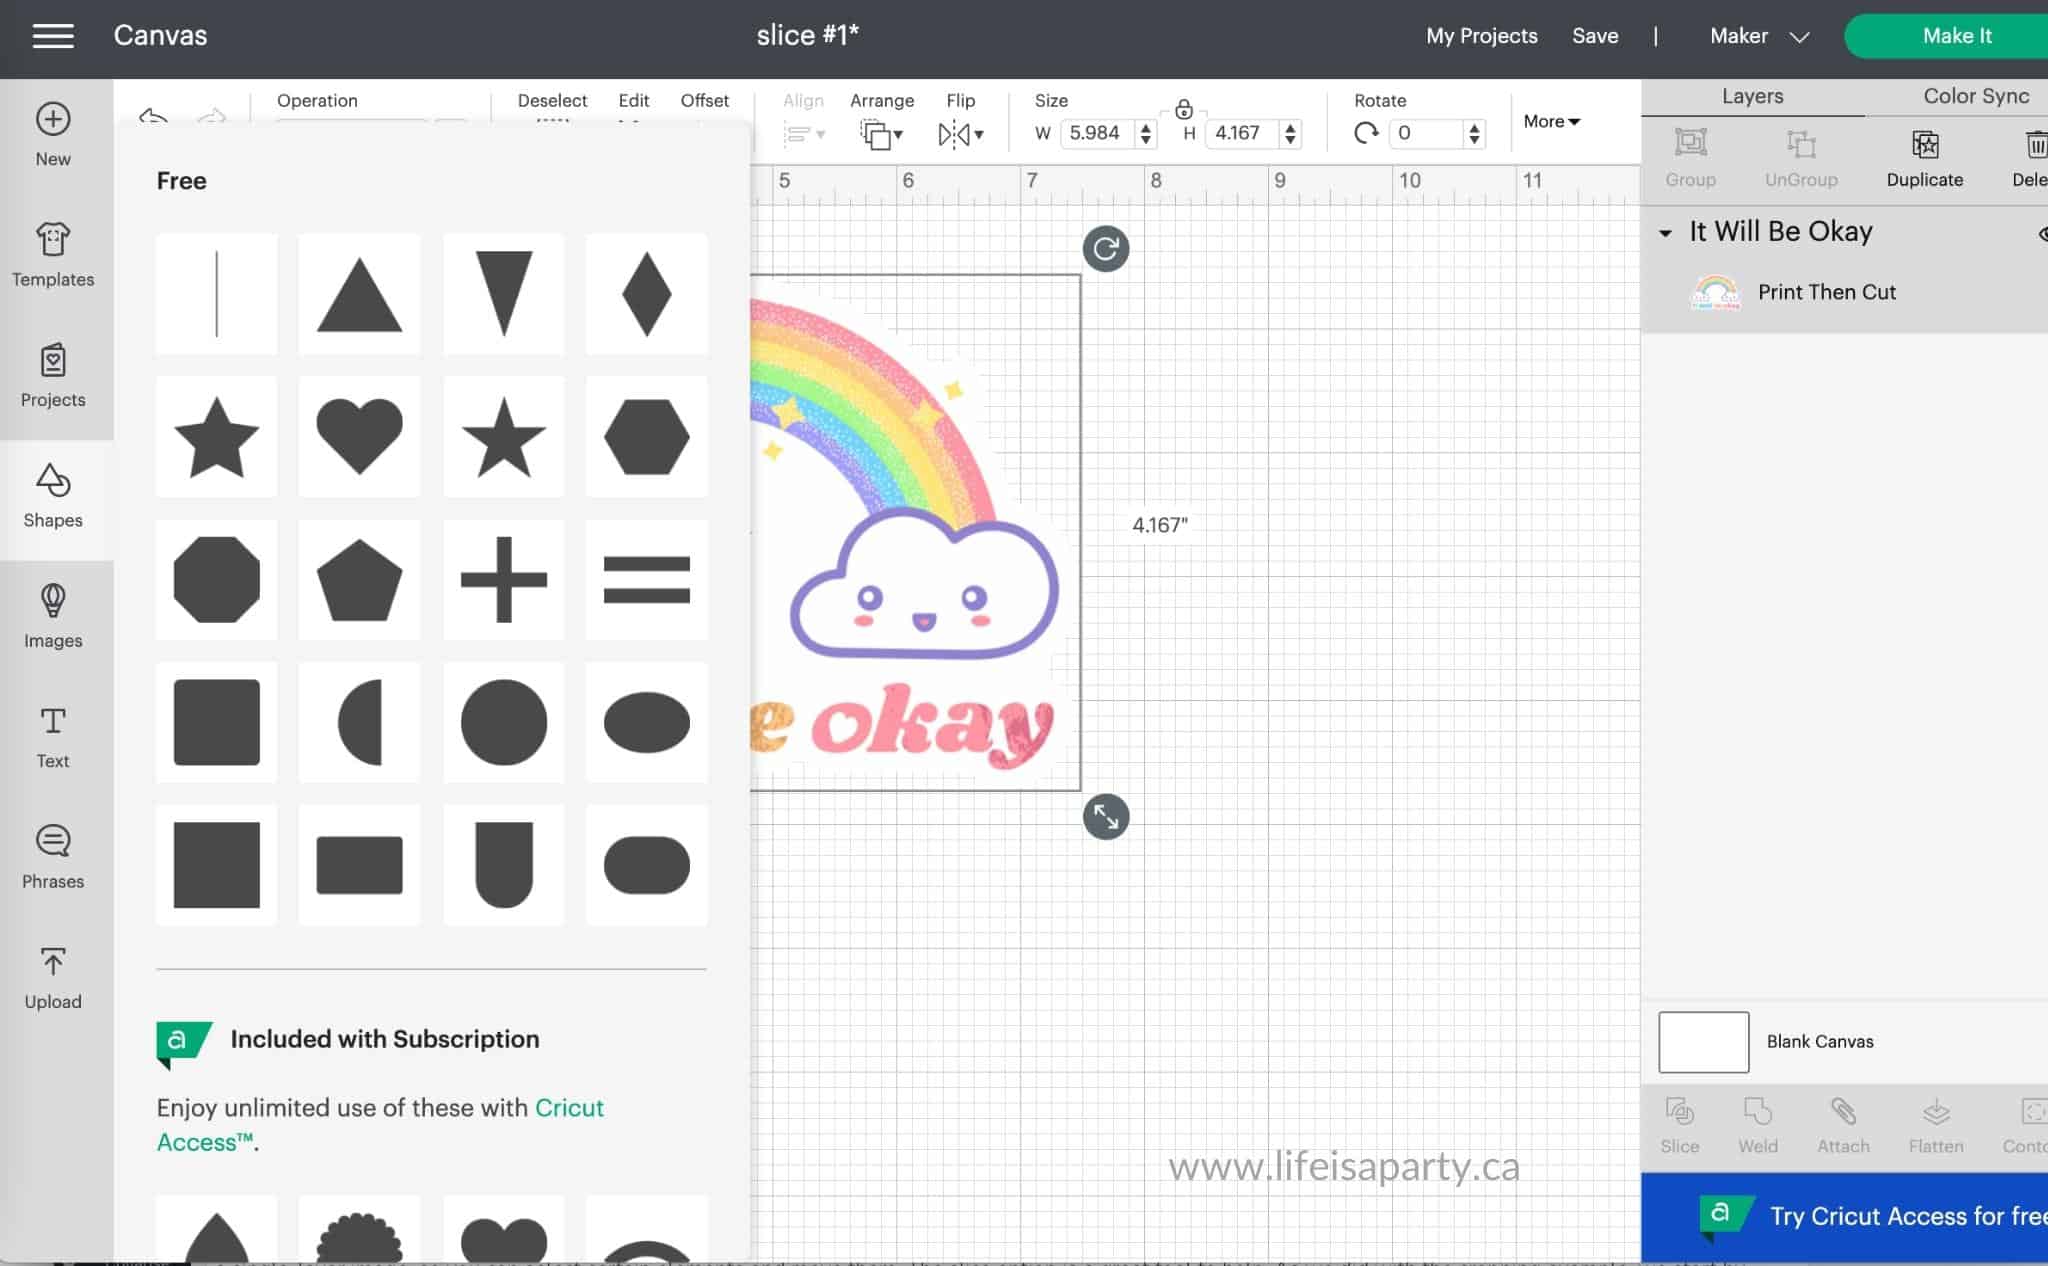
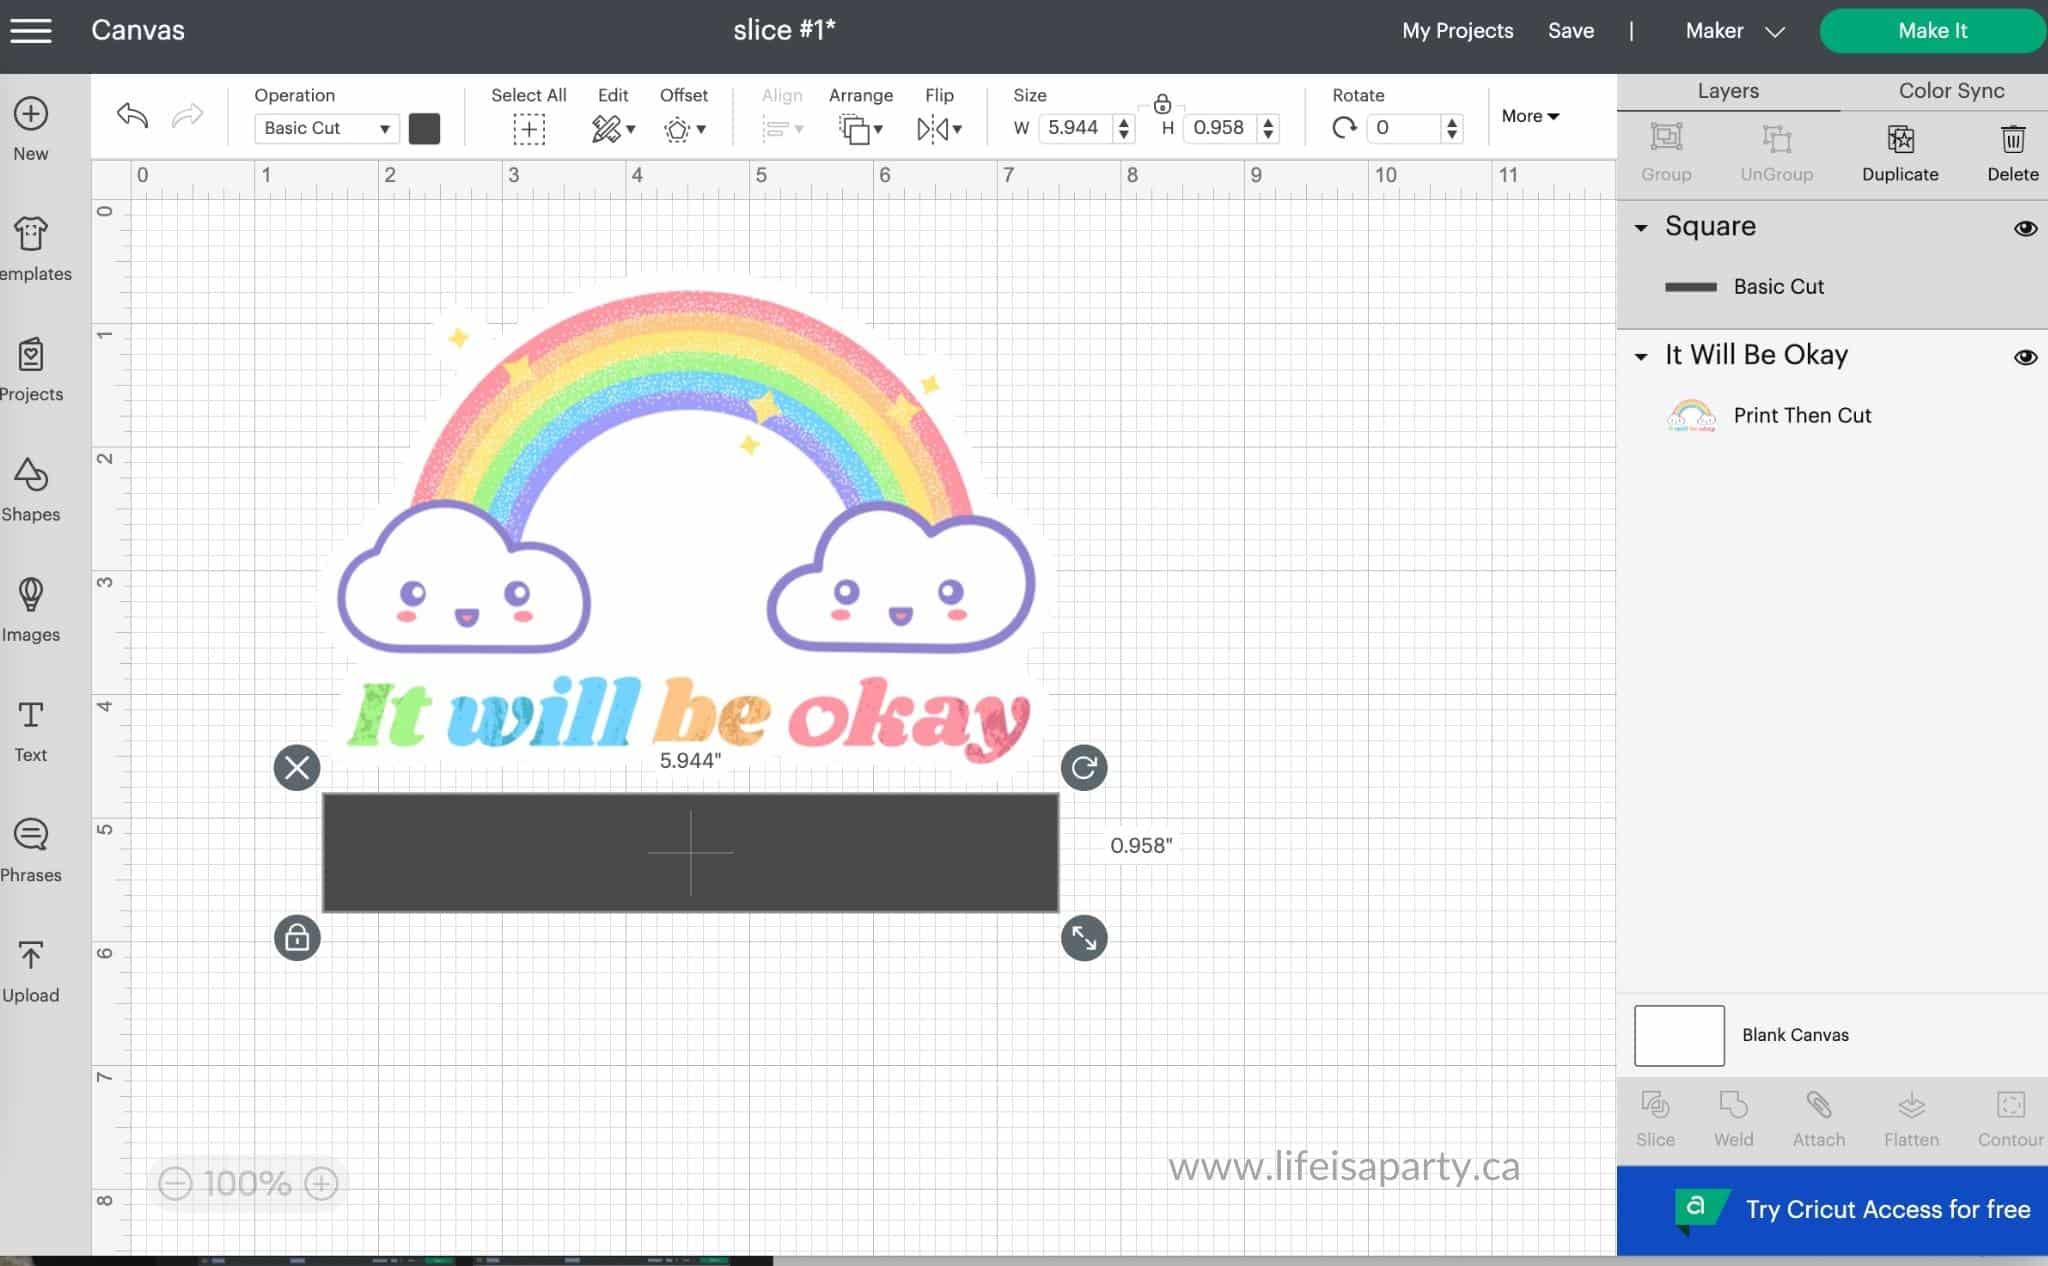
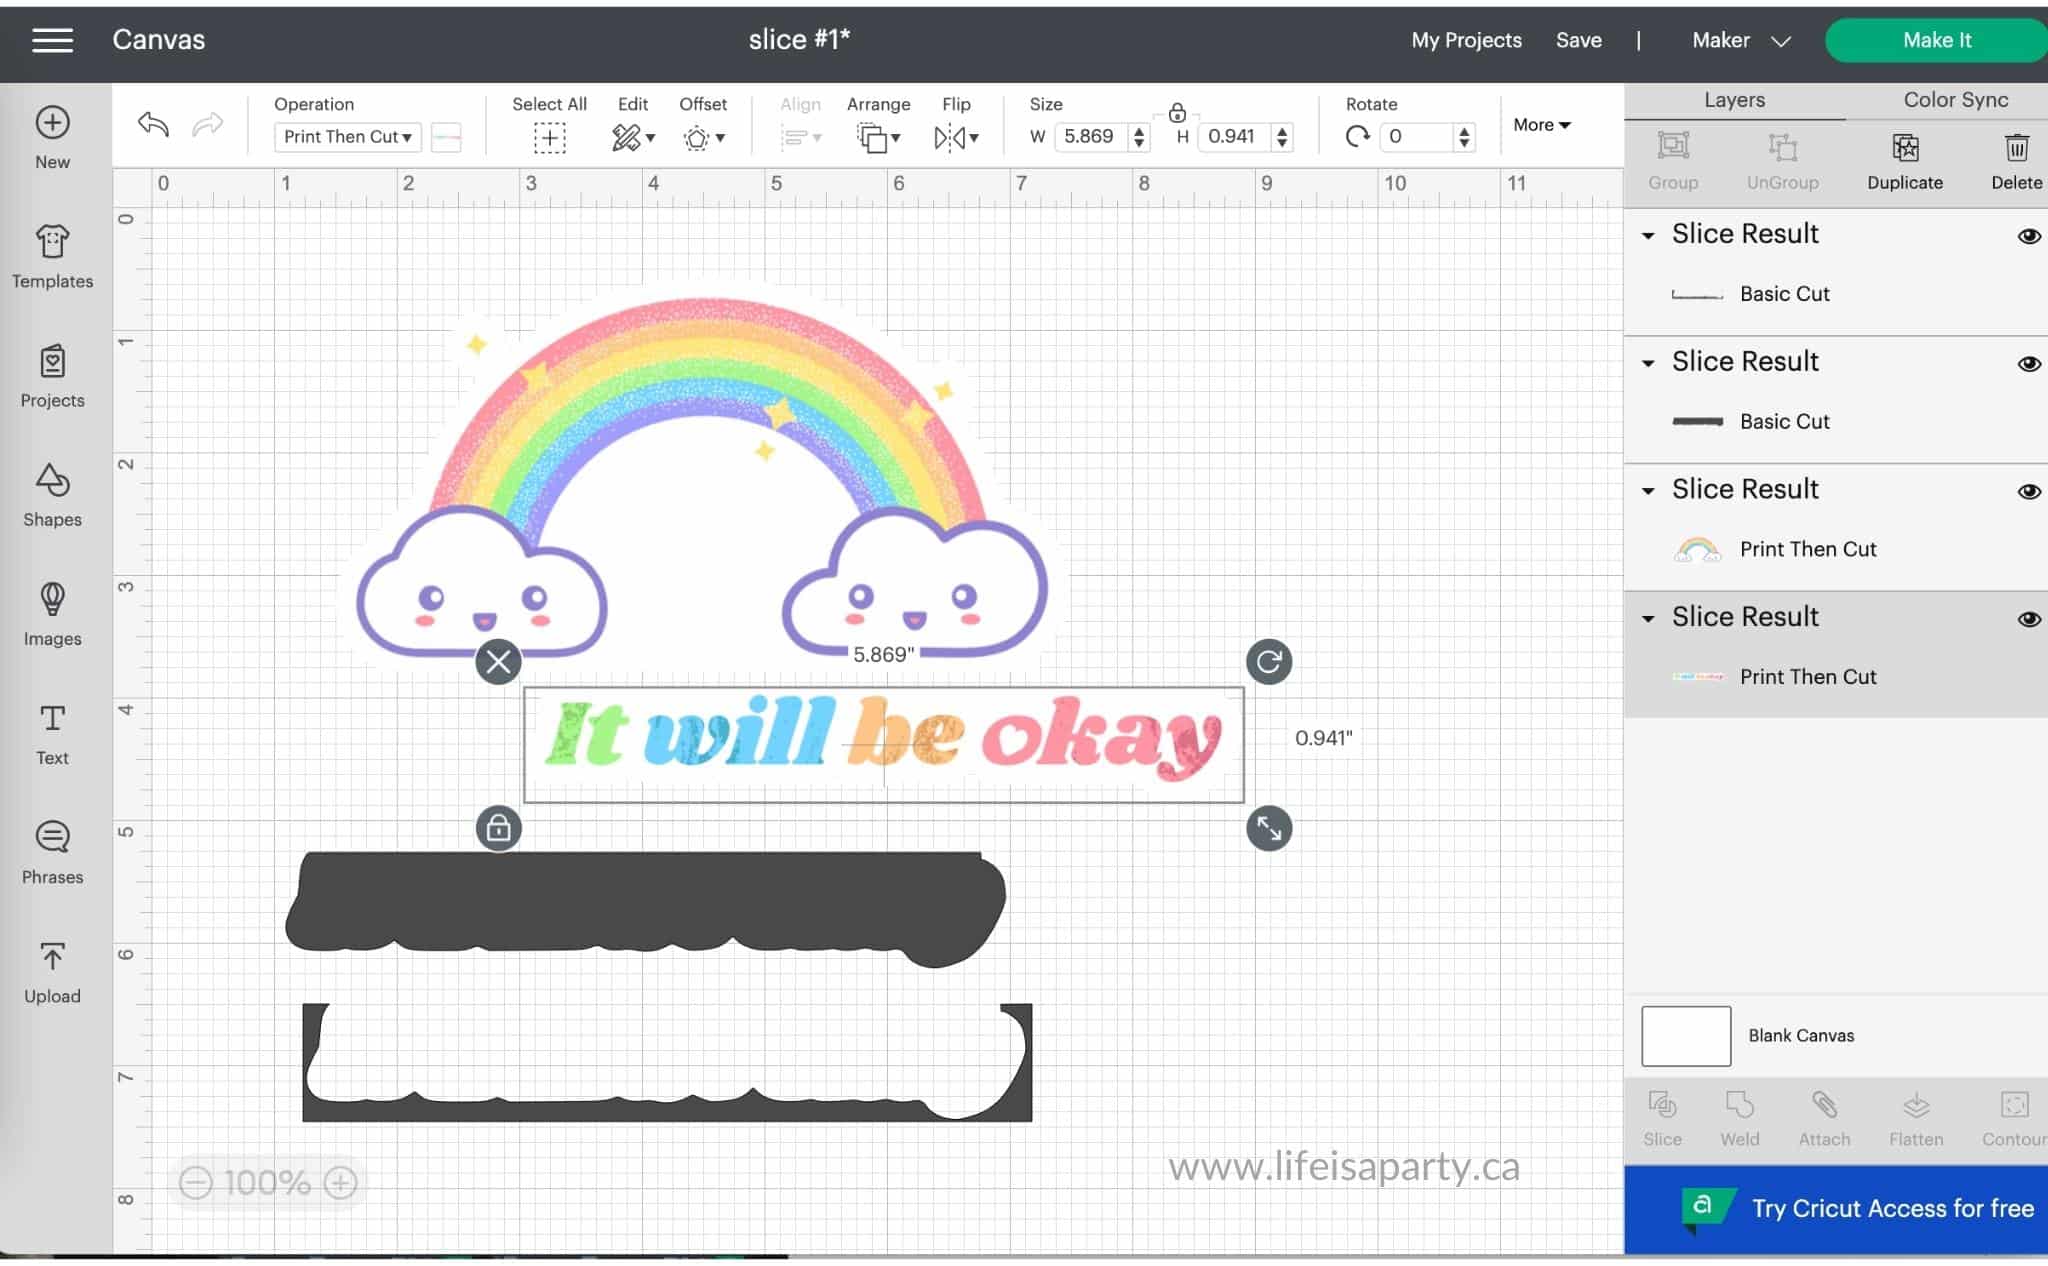
Next we'll select both items and click slice. Now we can look at our slice results in the layers menu, and delete the shape we used as well as the shape cut out piece. The text will now be it's own layer and we can delete it, re-size it, move it to the top, or do whatever we like with it, because it has become it's own layer.
Creating A Split Monogram
A popular project that uses slice is to create a split monogram made by slicing individual letters and adding in a name. It's very simple to do.
Open a new canvas, and click on the text button, and type a letter in the text box. Choose any font or font size that you like.
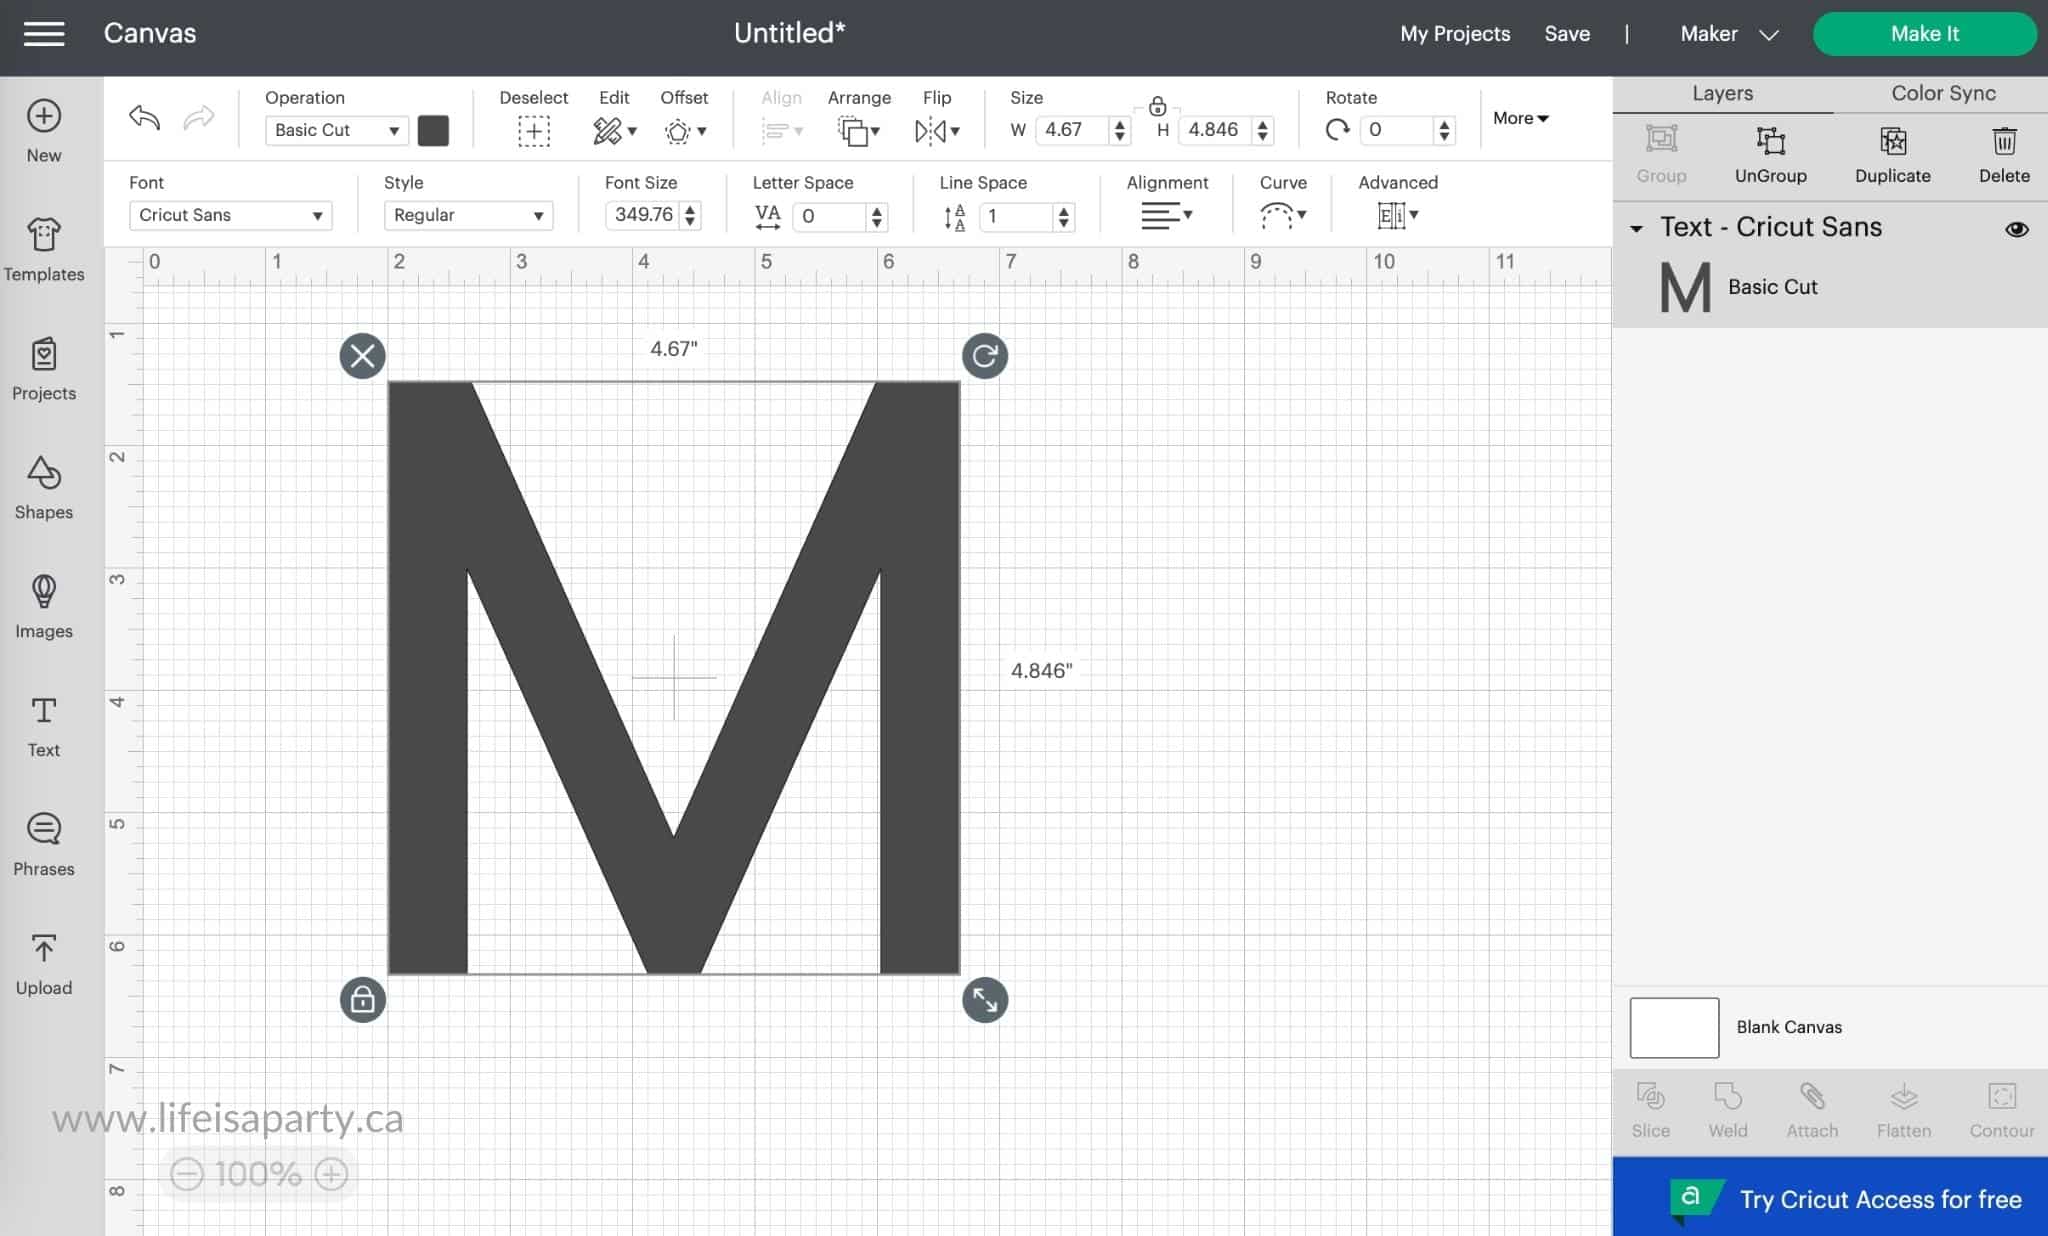
Next, add a square shape to the canvas, and click the lock on it's dimensions, then use the scale button in the lower right corner of the bounding box to drag it into a long and narrow rectangle. Select the letter and the rectangle and click on slice.
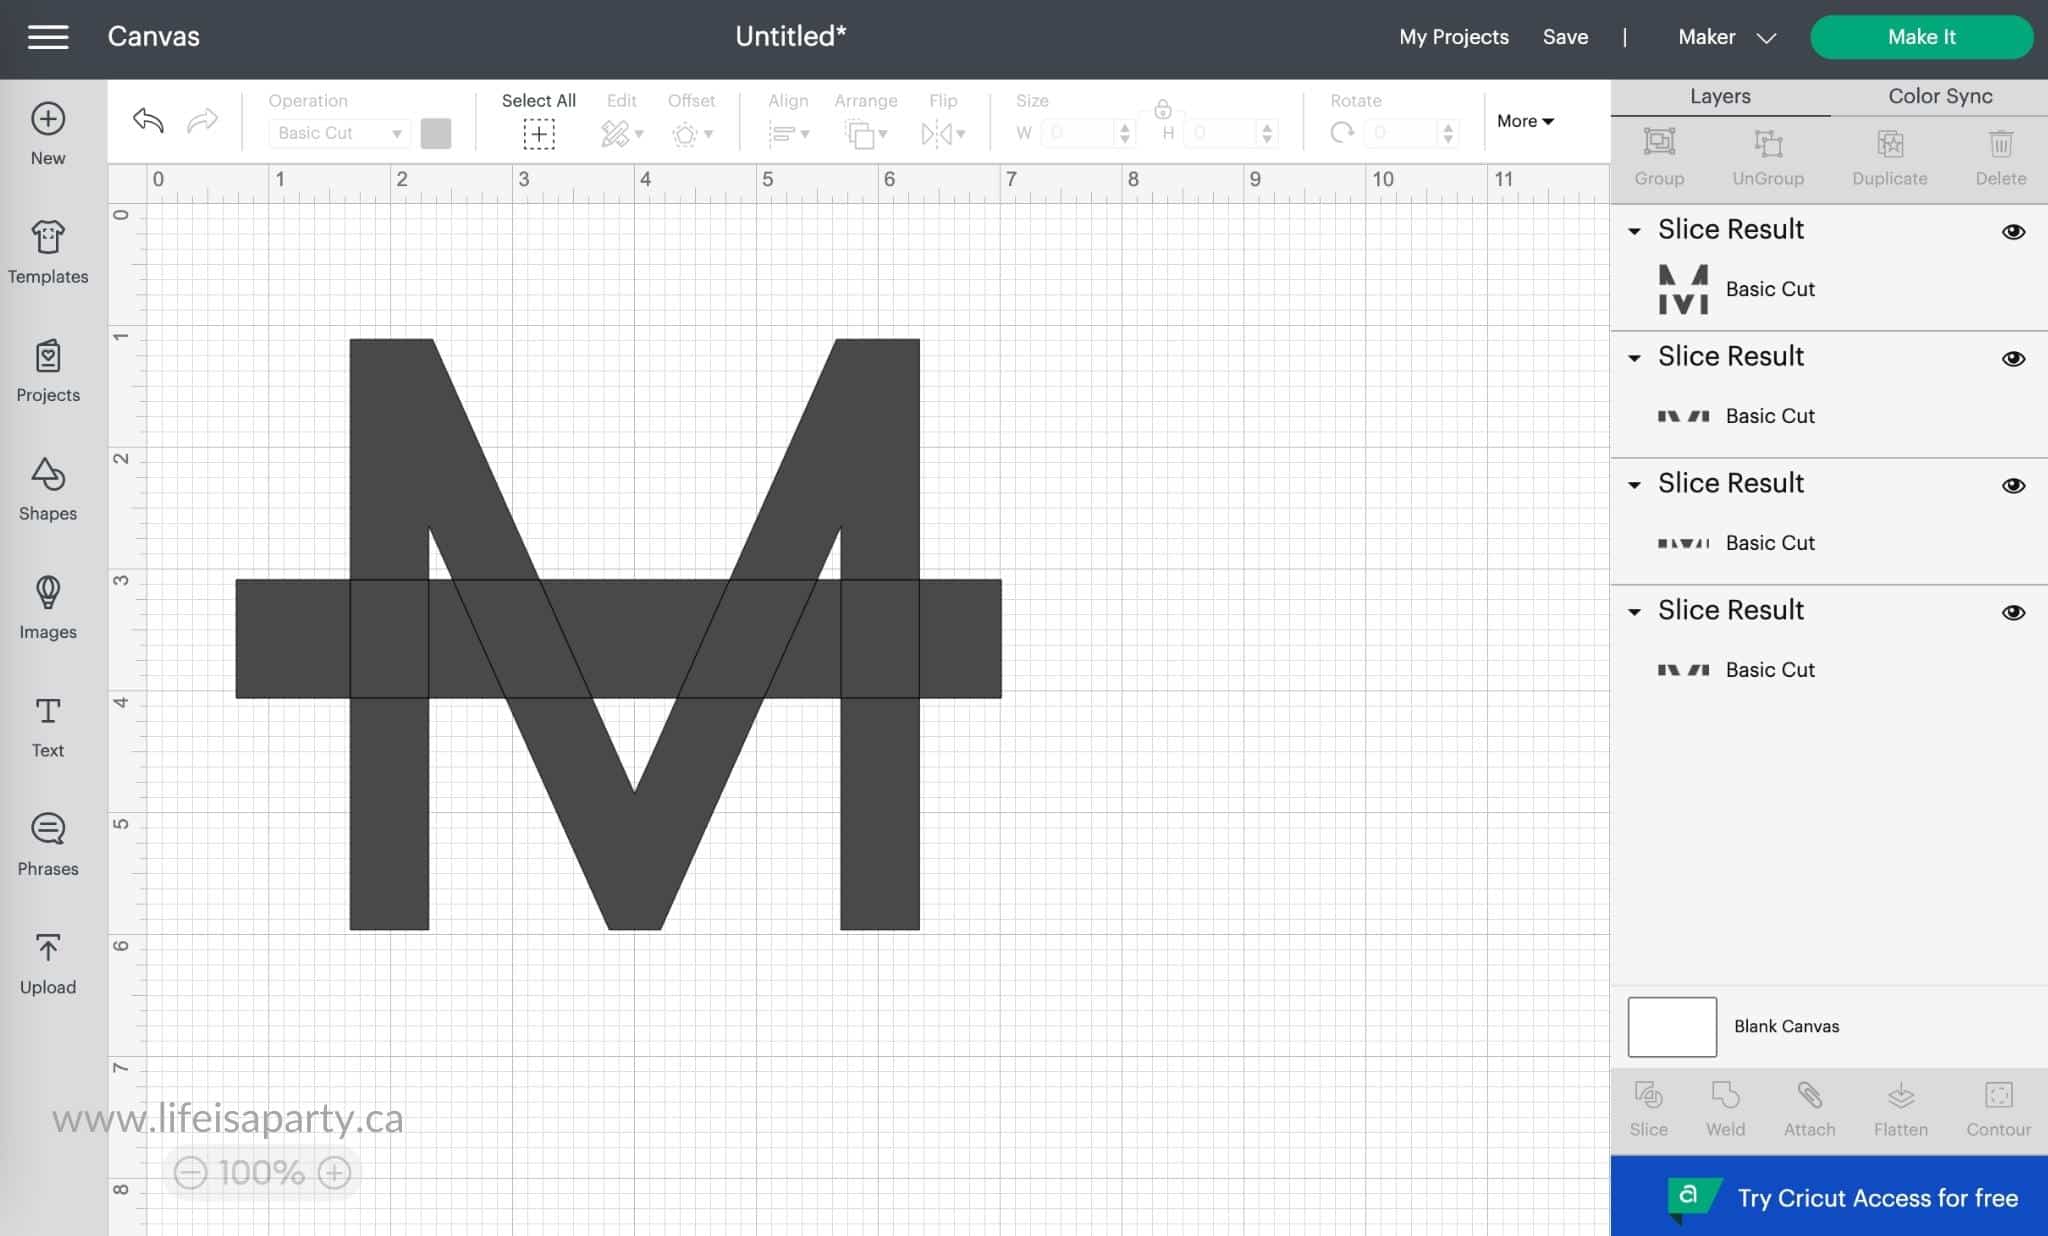
Now delete, the rectangle, and the pieces cut out of the centre of the rectangle.
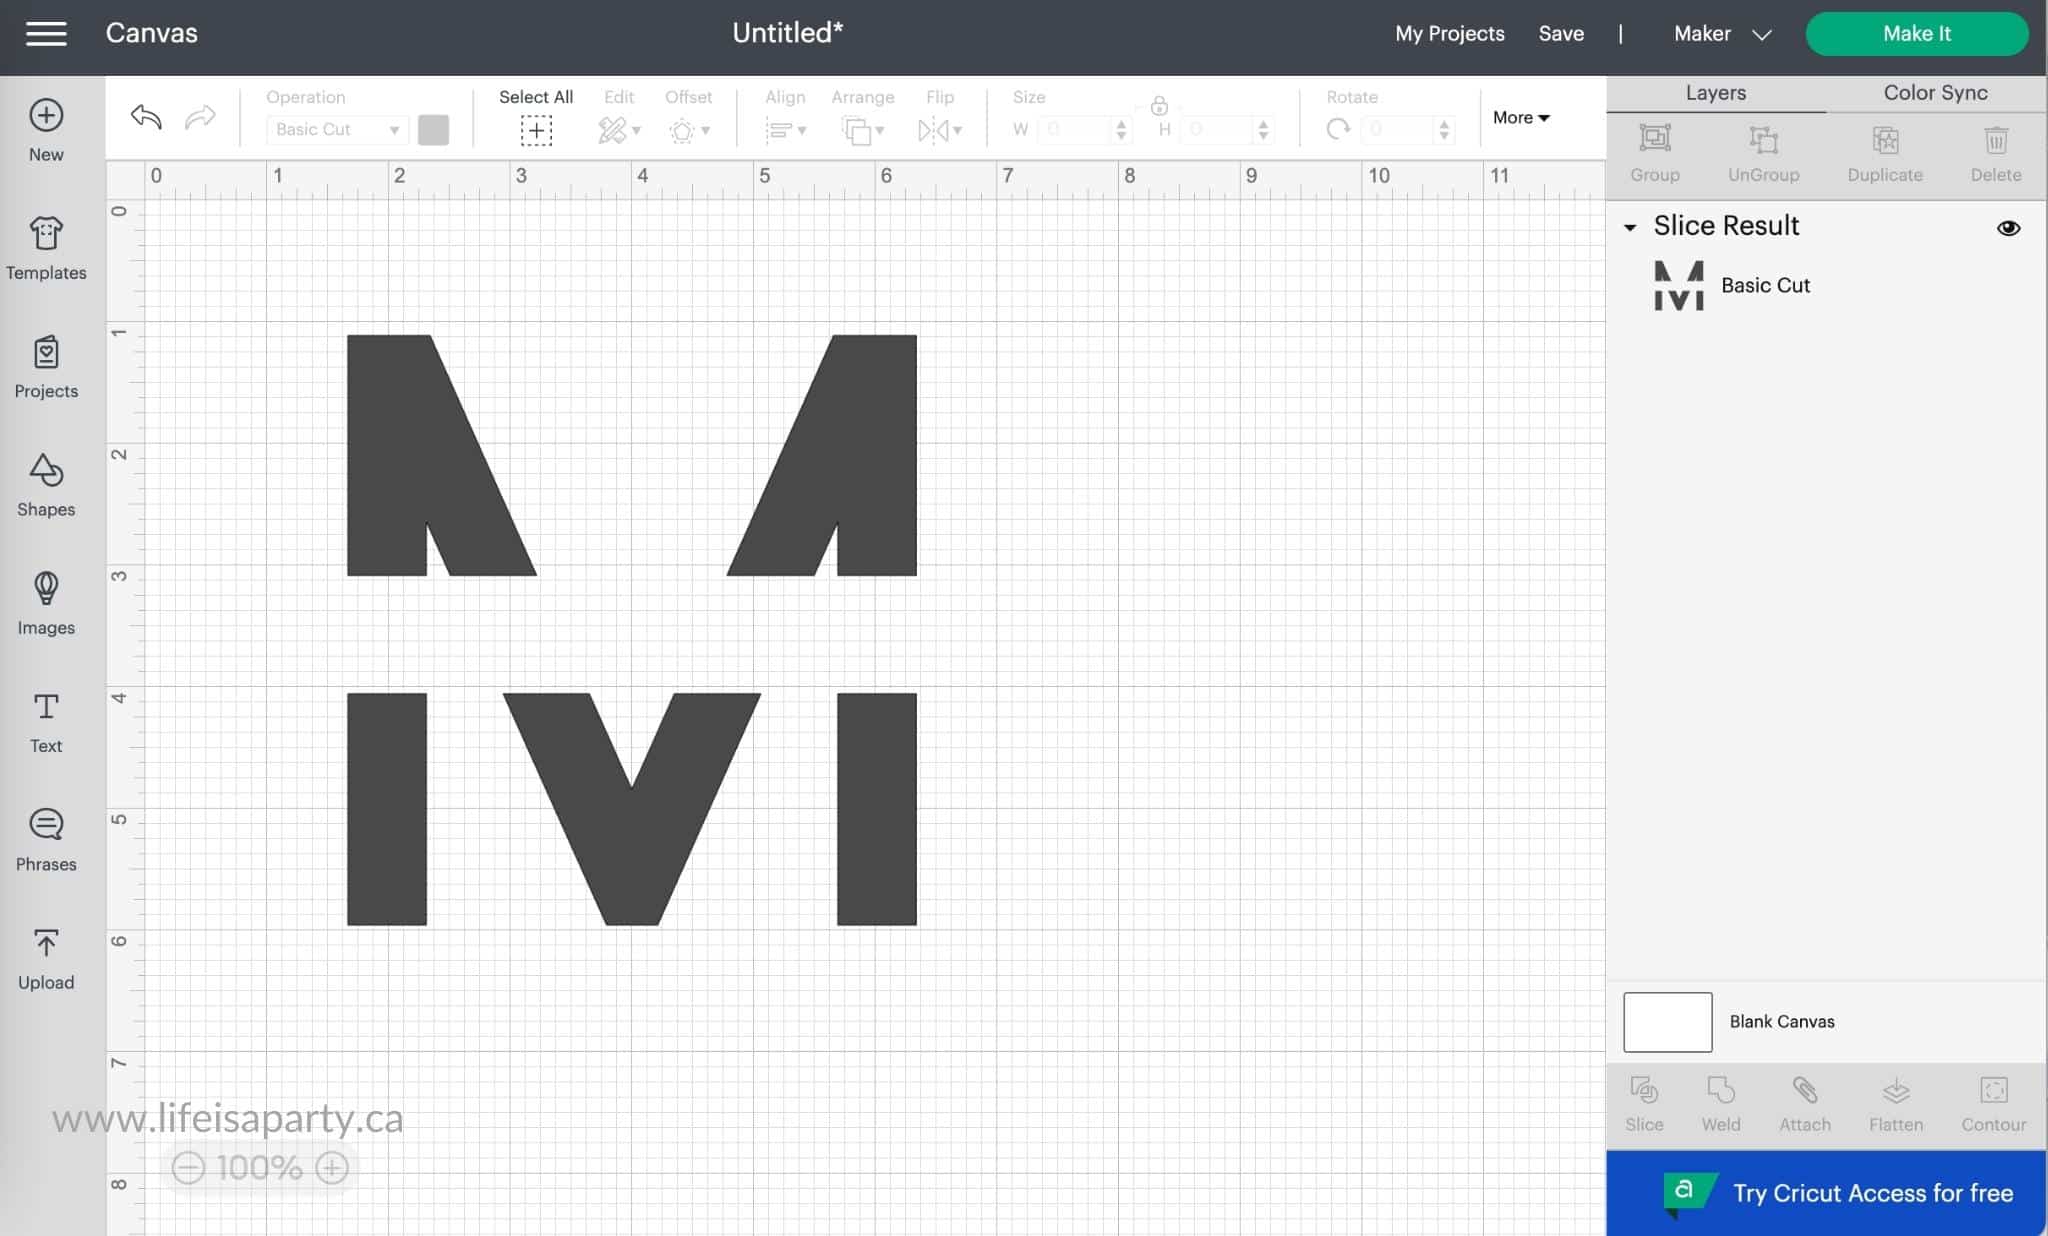
Now, create another text box and type out the name, choosing your font and sizing it to fit in the empty spot. Then move the name to the middle of the cut out letter.
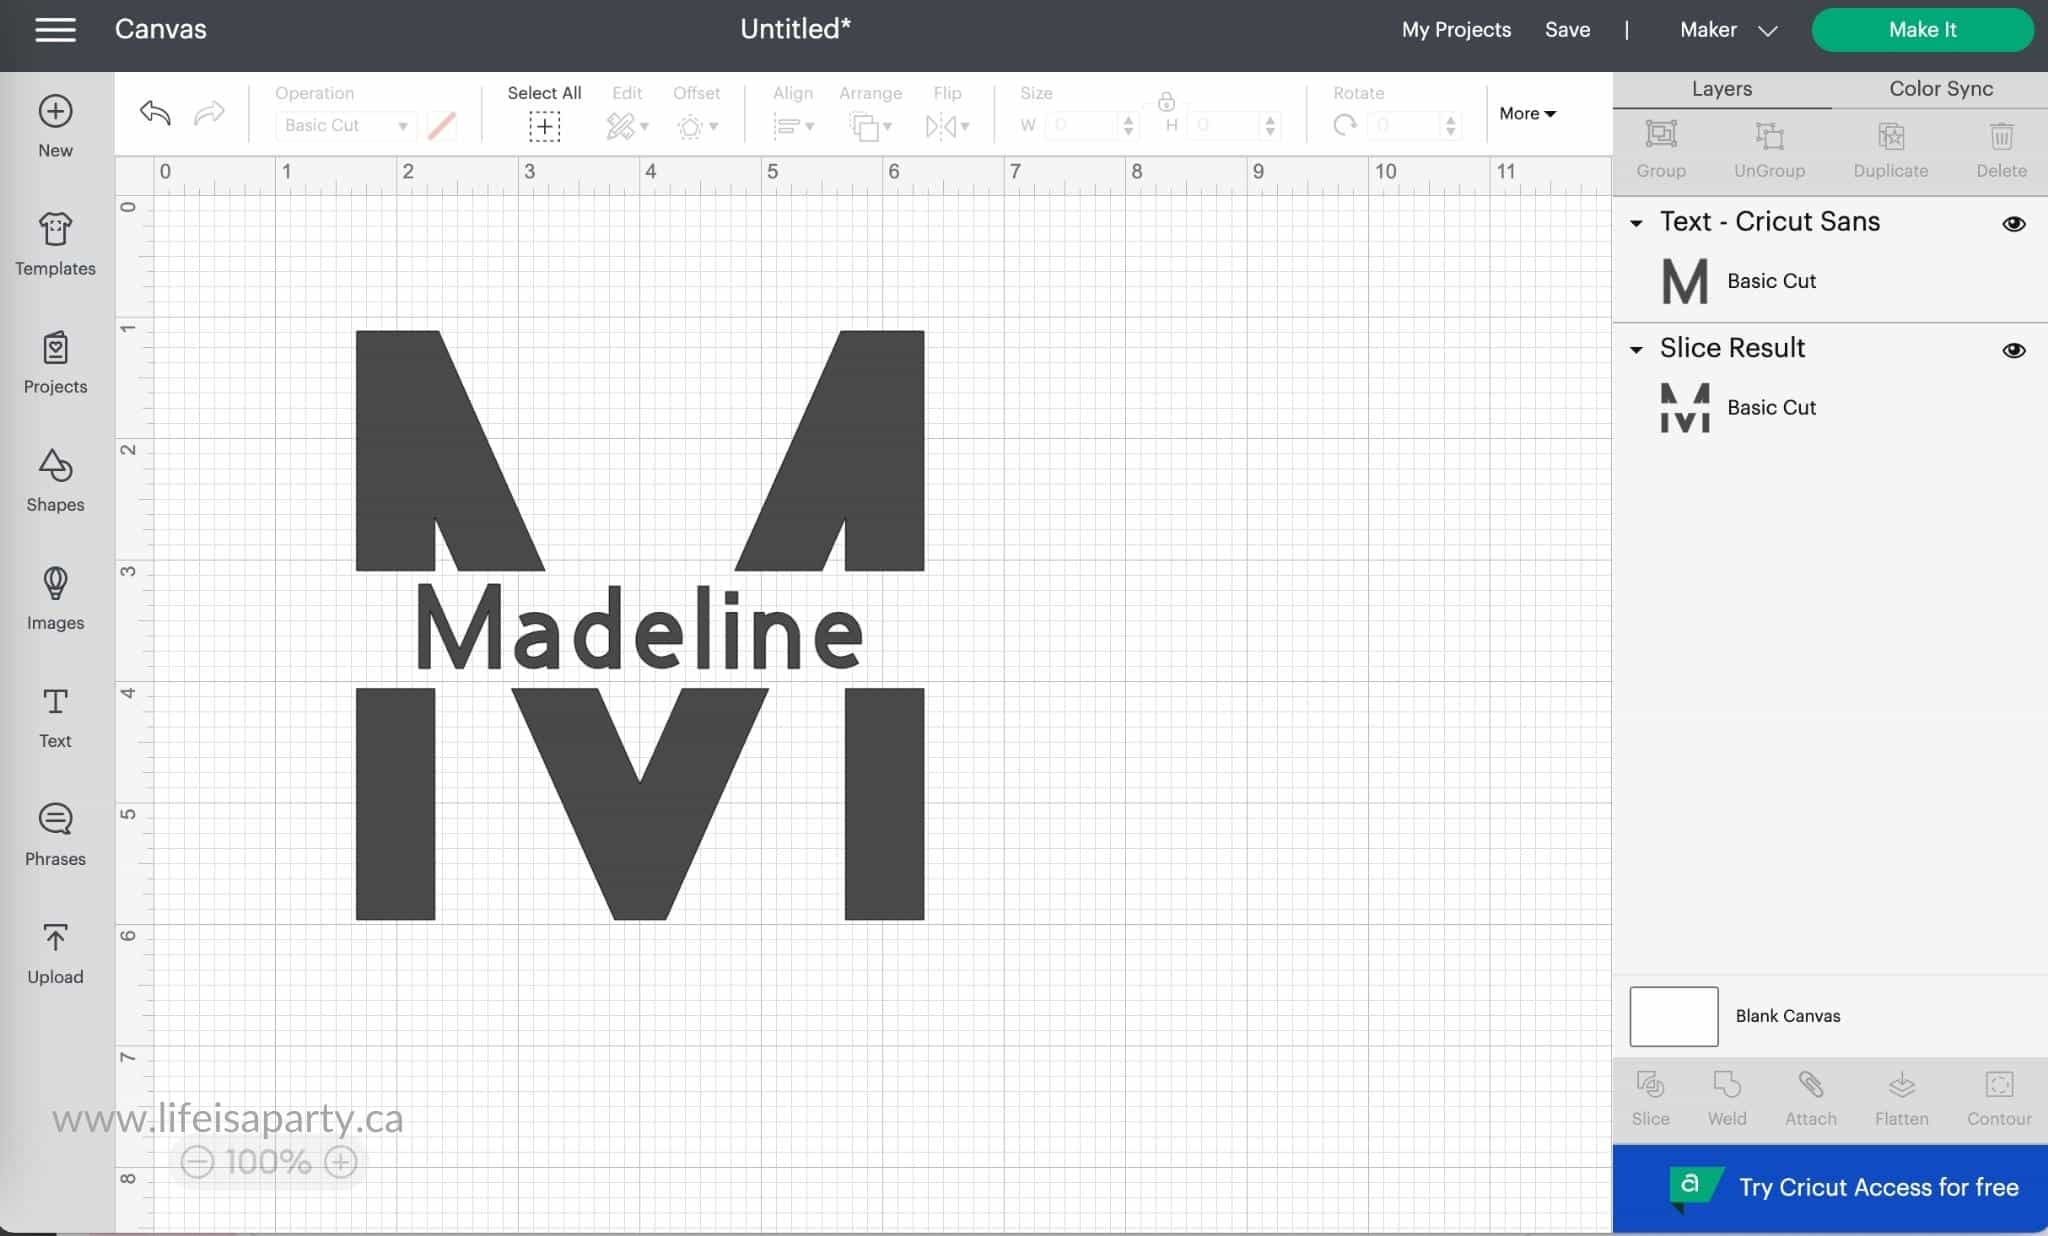
To add a line to the top and the bottom of the split, add a square to the canvas and unlock the dimensions. Size it to form a thin line the width of the monogram. Now use the duplicate button to copy it. Position one at the top and one at the bottom. Select both lines and the monogram and then click the weld button.
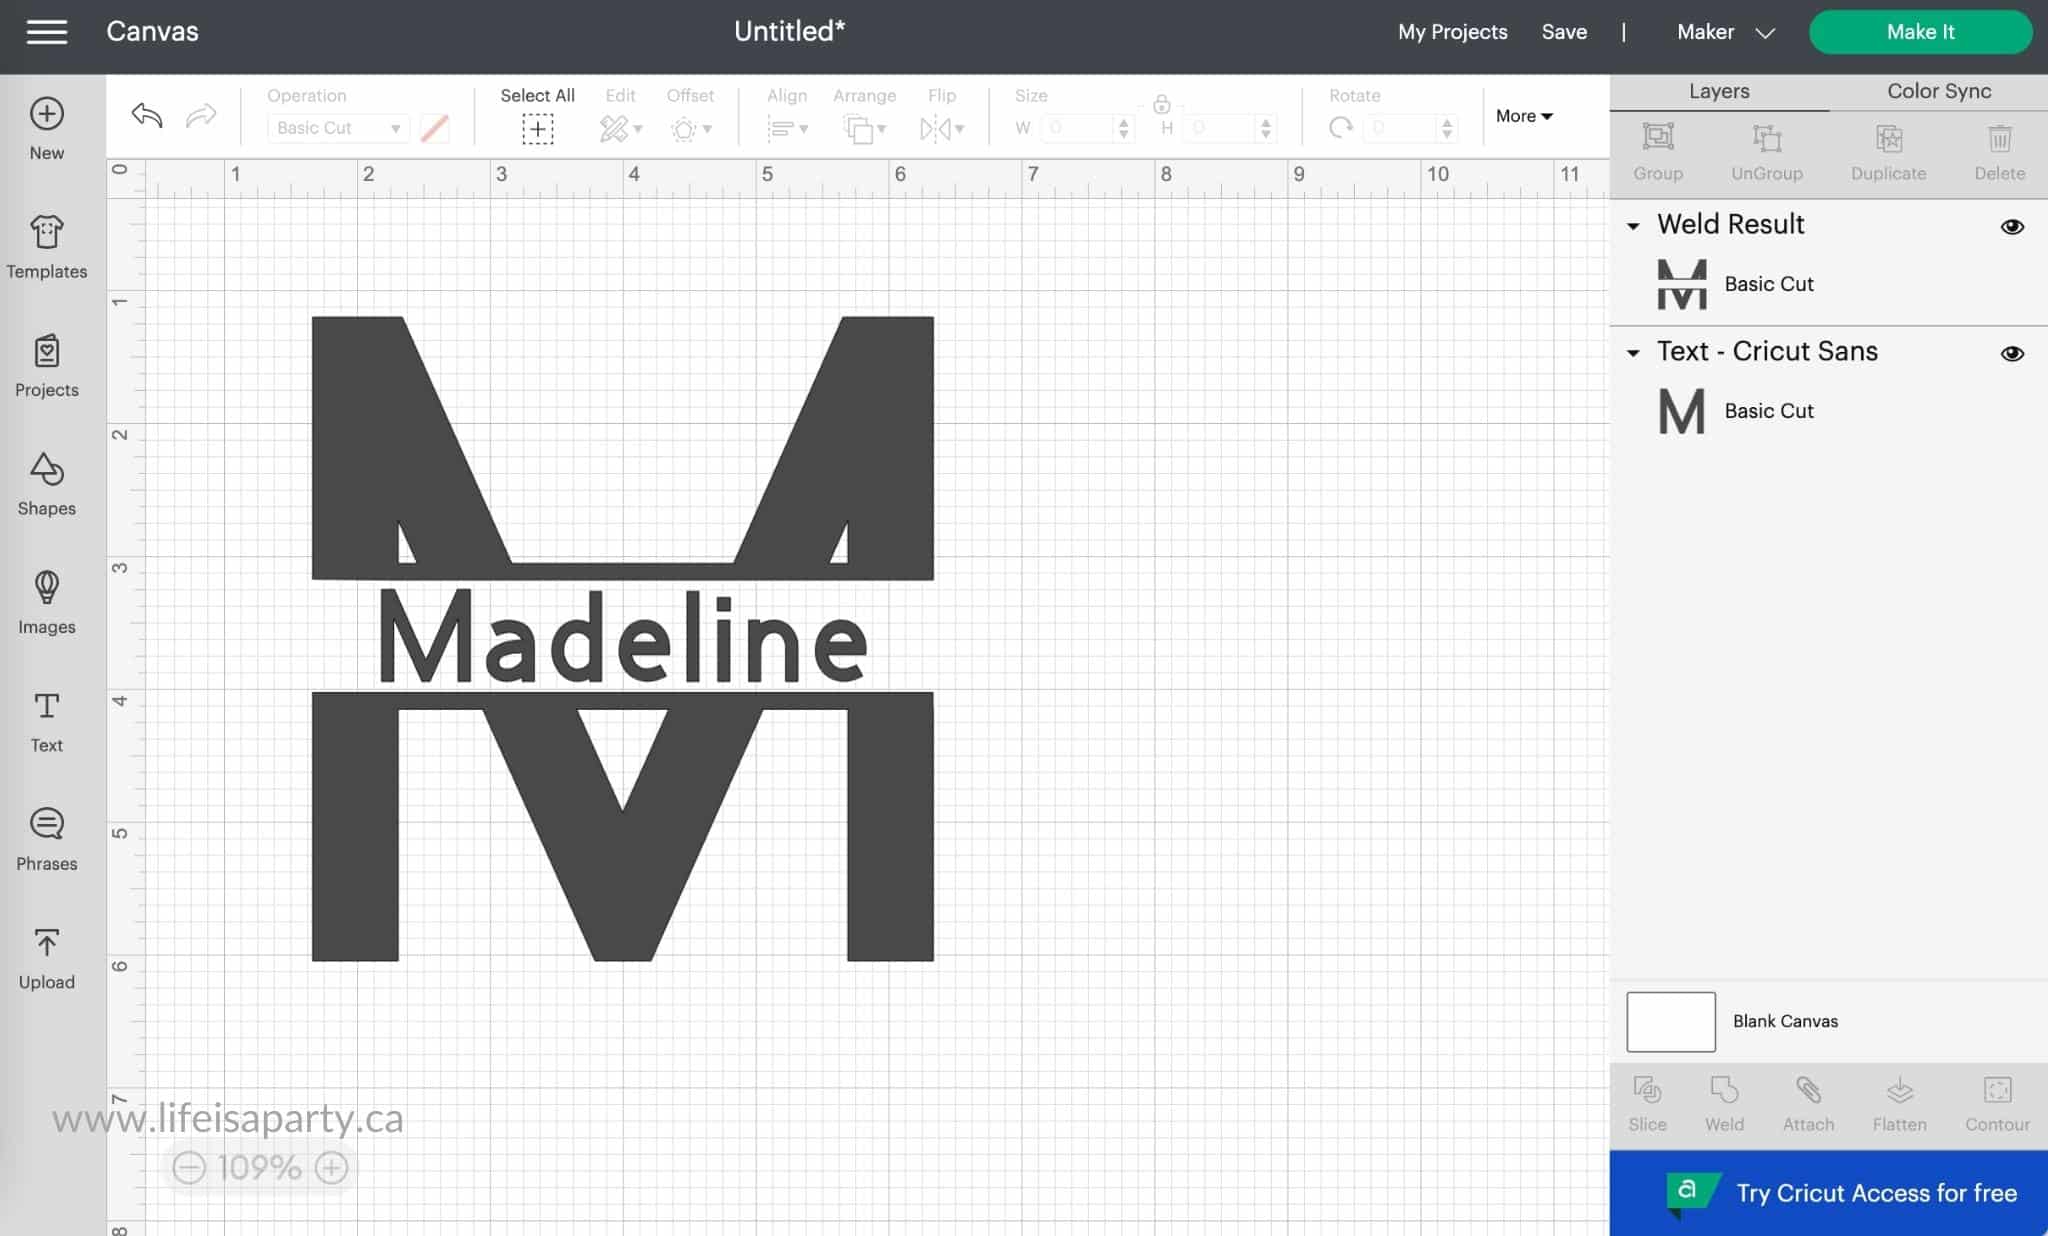
That's how easy it is to create a split monogram using the slice function.
There are so many different projects you can make using slice. I hope you've found these explanations and examples helpful. Be sure to check you the youtube video if you prefer to see a live demonstration of how to use slice. With all these cool tricks for using slice, life really is a party!
Subscribe For Lots More Cricut Projects and Tips and Tricks
Just for subscribing we'd love to send you our free e-book 10 Mistakes You're Making With Your Cricut and How To Avoid Them.
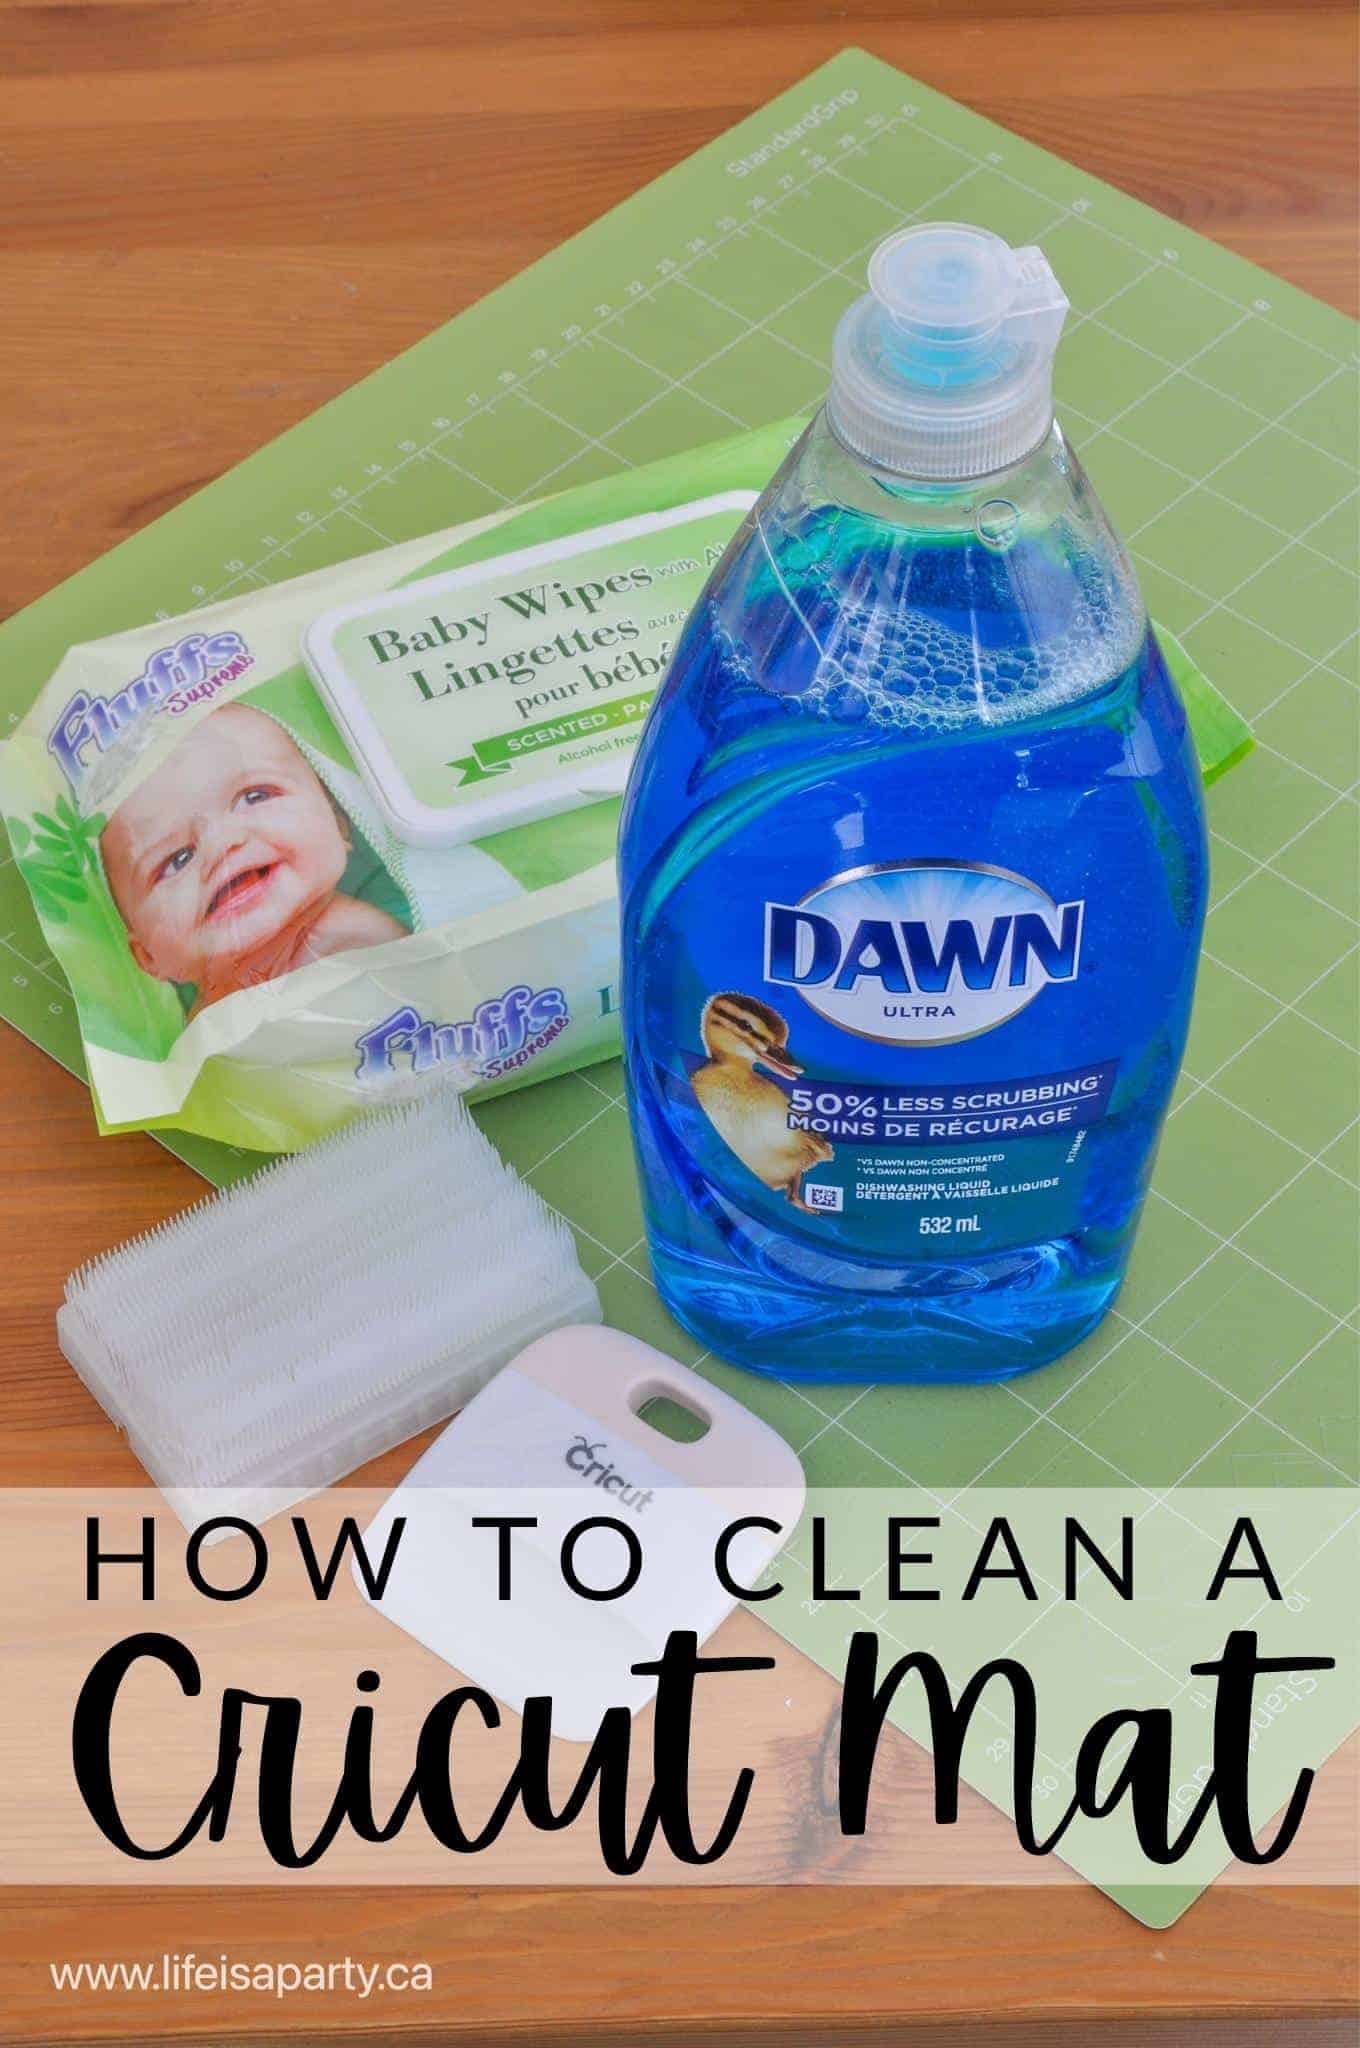
You might also enjoy The Best Way To Clean A Cricut Cutting Mat post here.
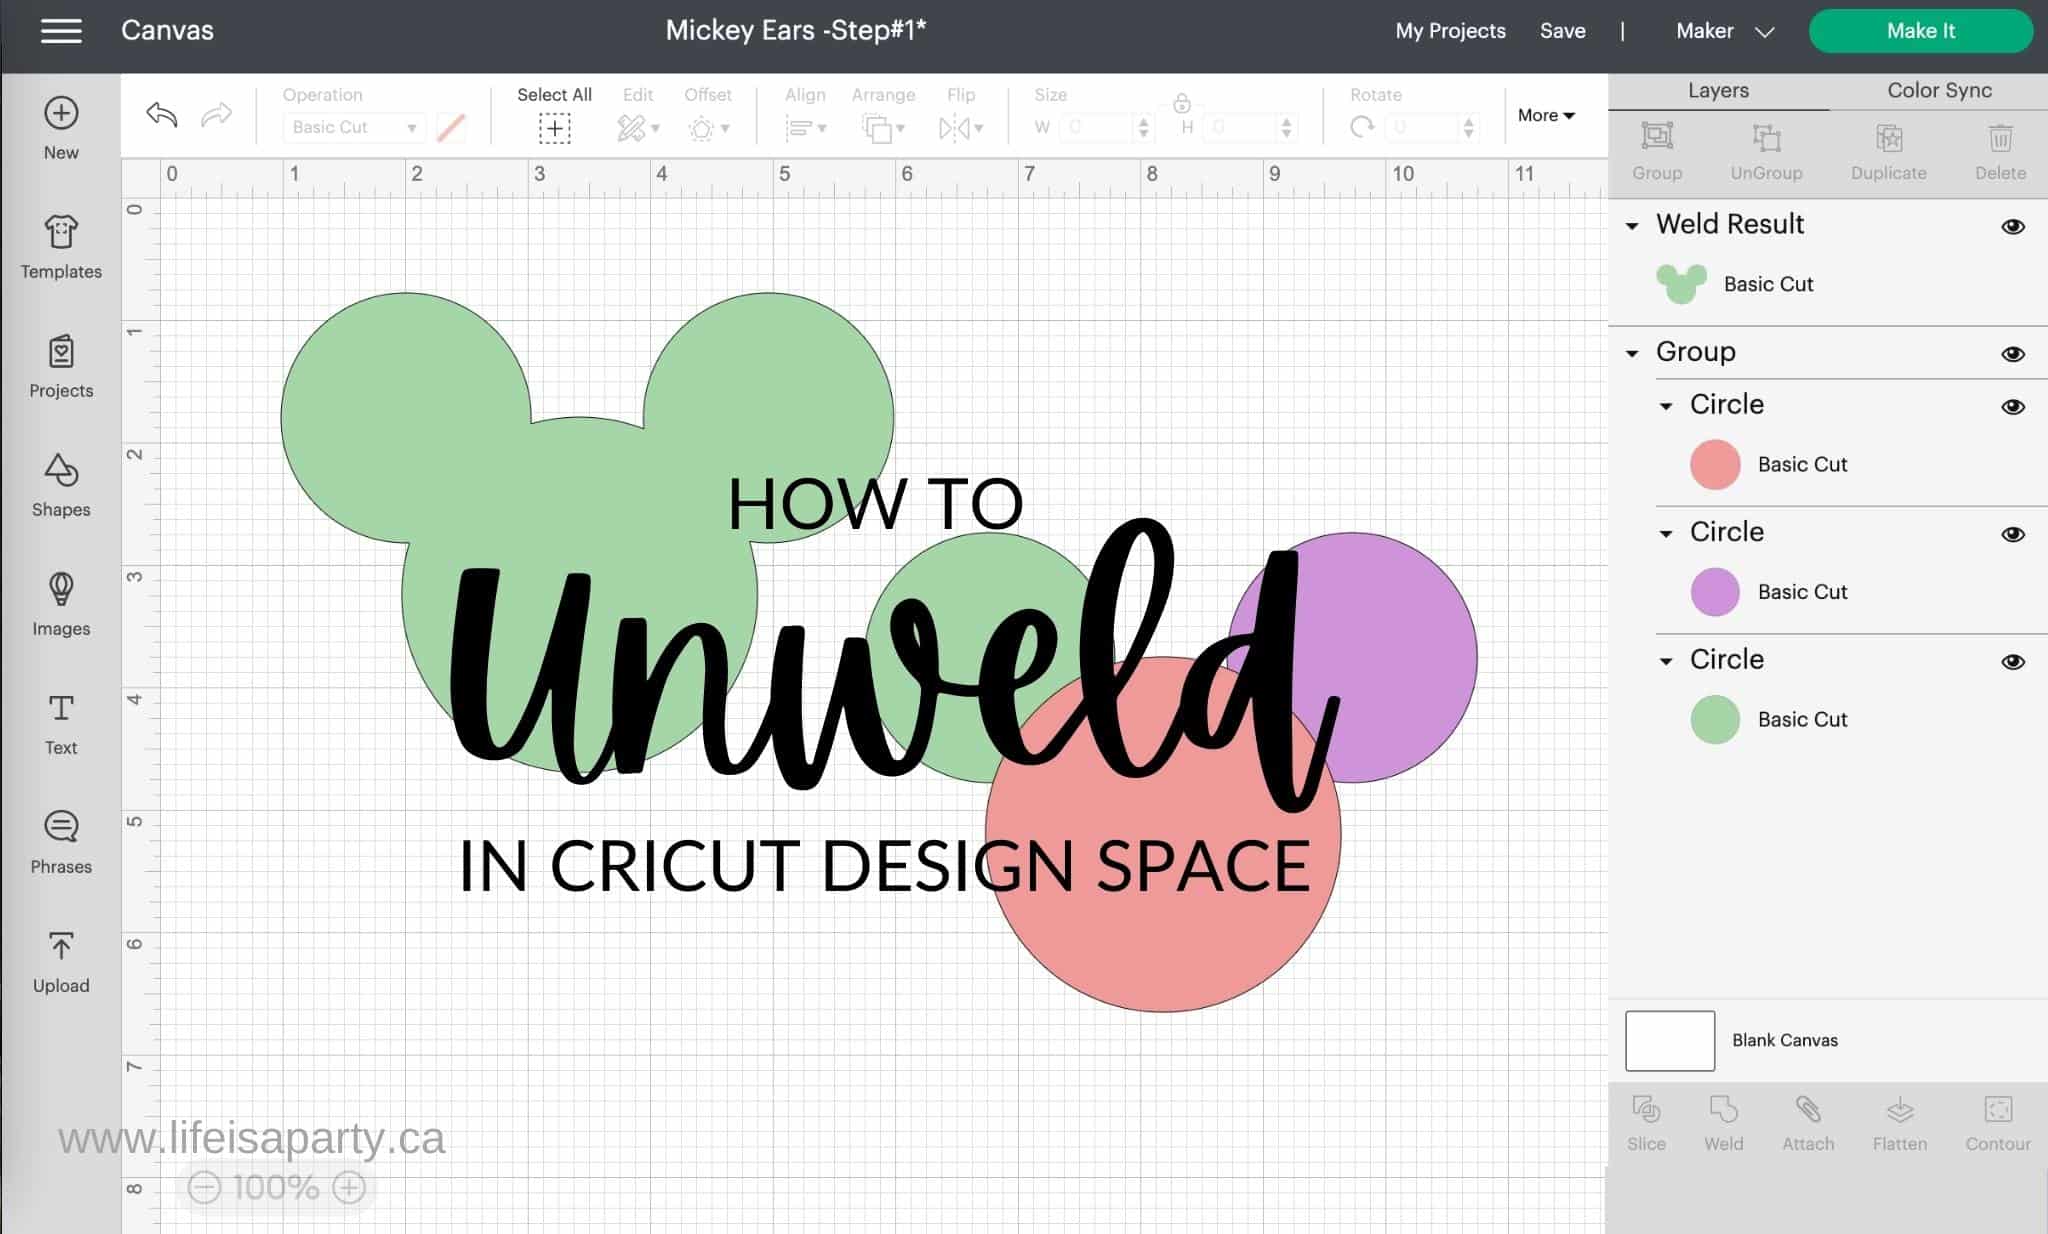
Also check out How To Weld In Cricut Design Space post here.


Leave a Reply